Companies
Install Joomla 3.0 from Scratch
If you are new to Joomla 3! And you have never used it before; it is good you can learn it here. Joomla is a fast growing web application written using PHP, hence you need a webserver to run it. To learn Joomla you just need to convert your computer into a webserver, and install Joomla on it. Installing Joomla is pretty simple, and you to follow the below steps.
How to install Joomla?
You need to install webserver with PHP and MYSQL. Installing a webserver manually is very painful and can easily be done by the help of a free 3rd party tool known as XAMMP. It is a free tool that helps you to install an apache webserver, PHP and MySQL on your computer. You need to download and install it from the link www.apachefriends.org/en/xampp.html
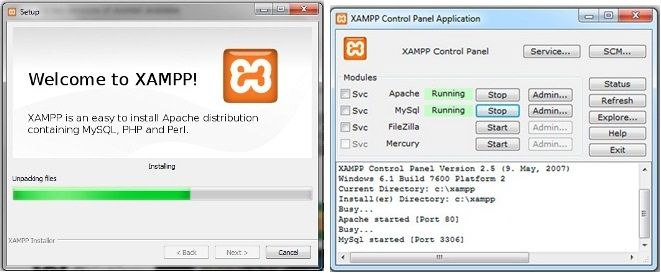
After you have installed XAMMP on your computer, you need to navigate Start-->All Programs--> Apache Friends--> XAMMP control Panel and click on the start button for Apache and MySQL. Now you need to create MySQL database and Account for installing Joomla! You can use a webserver application knows as ‘PhpMyAdmin’, to use PhpMyAdmin, just launch your browser and open http://localhost/phpmyadmin
Step-1
On the front page, you will find the following option to create database. Enter the name of your database you like and click on create. Please note the name you have entered above in step-1, you will require it while installing Joomla!
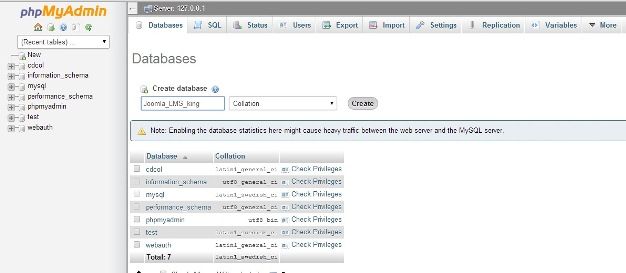
Step-2
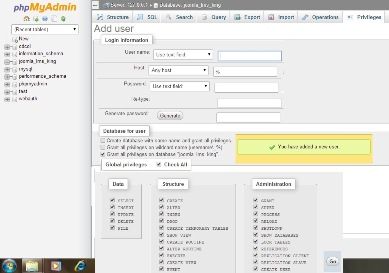
Now it’s time to create MySQL user account. Navigate to Add a MySQL user on the front page, click on ‘Privileges’. Then click on ‘Add a new user’, fill up the form to create a user as shown in screen above.
Installing Joomla! Now that you have already with PHP and MySQL, which you have just created above, let’s install the Joomla! CMS. Download the latest version of Joomla! From Jooma.org
Step-1 Joomla Installation- Configuration
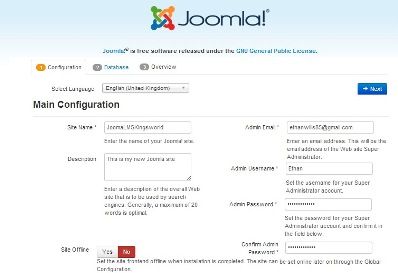
Save the zip file in root directory of the webserver, it should be like “C:\xampp\htdocs\” make a folder ‘Joomla_LMS_King’ and extract the archive in it. Now you can access the file from your web browser by typing address “localhost/Joomla_LMS_King”, it will show you the below installation screen.
- Site Language- Auto identified from the browser.
- Site Name- Enter you site name, I used “Joomla_LMS_King
- Description- Enter the “meta description” this will be used by search engine. Generally 20 words are optimal.
- Admin E-mail- Please enter a valid email address, in case you forget your password. This option will help you retrieve your password in future.
- Admin User Name-Please leave this a default, since Joomla uses “admin” as super user. You can change it latter.
- Admin Password- Try to use a complex password and confirm the password in “Confirm Password box”.
- Site Offline- ‘Yes’ means installation is complete and you are online, else it will display message as 'Site is offline’
Step-2 Joomla Installation-Database
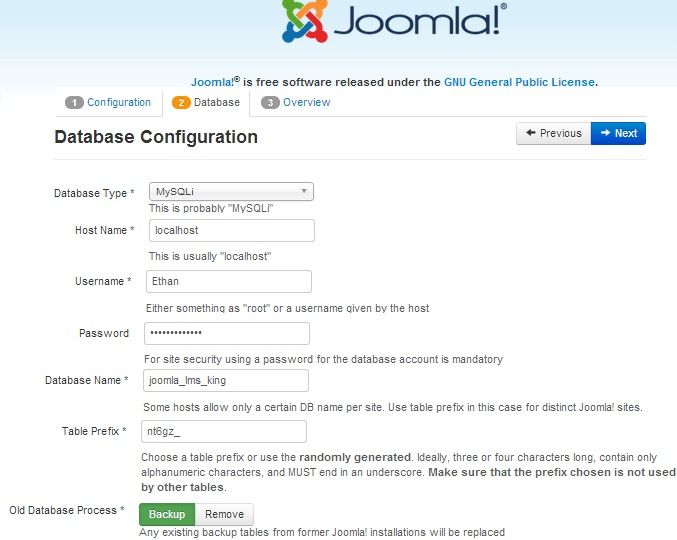
On Second Screen will see all the database settings, this is very easy settings.
- Database Type – MySQLi is the commonly used database.
- Hostname – here it is ‘Localhost’, but depends on address of your host.
- User name & Password – Used to connect to database.
- Database – Is the name of your database.
- Table Prefix – Table prefix is automatically generated. You can always change it, but remember to use special underscore ‘_’ at the end.
- Old Database Process – Leave this option unchanged for the time being.
Step-3 Joomla Installation- Finalize
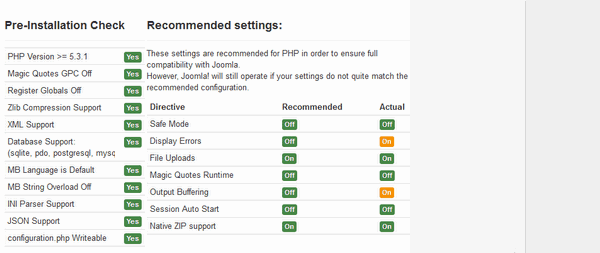
Now it is time to finalize your Joomla Installation. Since you are new to Joomla! You can select sample data, to know how Joomla websites works. You will find a default being selected as “None”. Second part of this page will take you to the re-installation checks. You can check the installation steps. And finally you see the “Congratulation!” message, here you need to remove installation folder. This folder is removed for security reason; you won’t able to see your site unless you remove this folder completely!
Congratulation! You have successfully installed Joomla on your computer. Read the next post ‘How to make a successful website using Joomla 3!”
