Joomla LMS
Companies
Article was already bookmarked.
How to create a certification path with scorm module in less than 5 minutes.
Q. How canI quickly create a certification path for a SCORM module.
A. Lets start from the beginning.
1. Go to the start tab and Click the Open Create link in the left menu.
Then select the Creation Wizard.
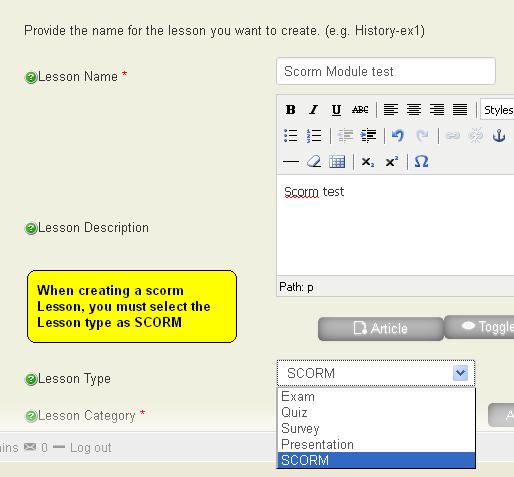
2. Fillout the lesson details form and ensure that you select the Lesson Type as SCORM.
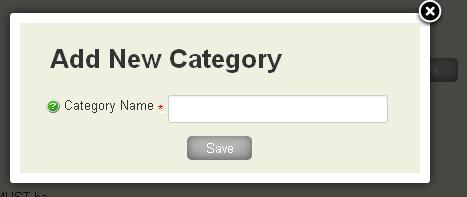
3. Select select your category. If the list is empty, click the button to add a category and you will see a popup where you can dynamically add the new category.
4. Select the Teacher and asistant for the lesson. If these users haven't been created yet, then you can click the Create links to the right of the input fields. This will open the user manager in a new tab of your browser where you can create the new user account. Ensure that you go to the Second tab and assign the new user to the correct group. IE Teachers or Assistants.
When you have saved the user accounts. Come back to the wizard and click the refresh link.
Now select your teacher and Assistant for the new lesson.
5. If you have the feedback component installed and configured, you can select a feedback form where the student can use to provide feedback about the lesson once completed. This is not a required field. It is optional.
Click Next to go to the next page of the Wizard.
On Step 2 of the wizard, you will see the configuration page for the lesson.
This page controlls how the lesson will appear and when.
In SCORM lessons, many of the fields here will have no effect, so are unnecessary.
The field "Pass Marks %" is needed for reporting purposes and calculating succesful completion of the lesson.
With this field filled out, you can continue to the next Step of the wizard.
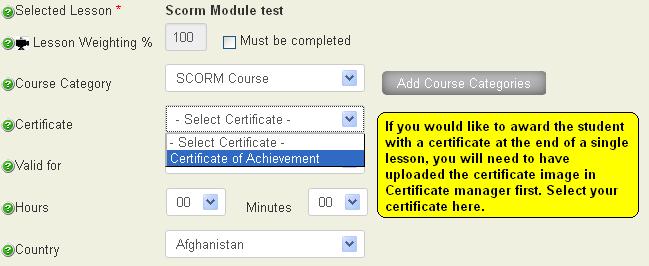
On the next step, again, most fields have no effect on a SCORM lesson.
If you want to provide the student with a certificate on completion of this ONE lesson, then here you can select a pre uploaded certificate that they will be awarded on completion.
Continue to the next step of the wizard.
This is the final step for SCORM lessons.
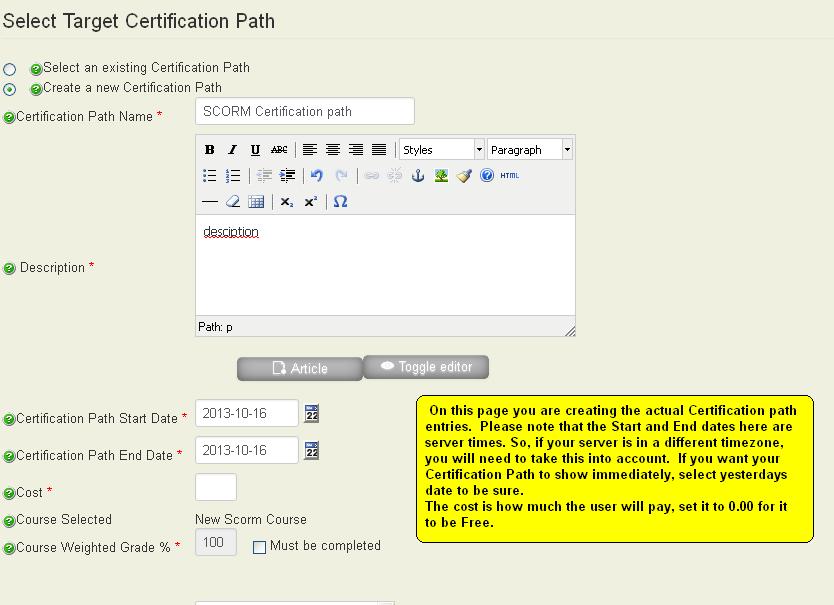
Here you are creating the certification path that will be first visible in the front end.
Please note that the Server is in a different timezone, the Certification Path may not show immediately, so you will need to take this into account when selecting the Start Date. To be sure, if you want the Certificaiton path to show immediately so that you can test it, then select yesterdays date as the start date.
The Cost field is how much the user will pay to access the Certification Path. If you set it as 0.00 then it will show as Free in the front end.
On this page, you need to select FINISH.
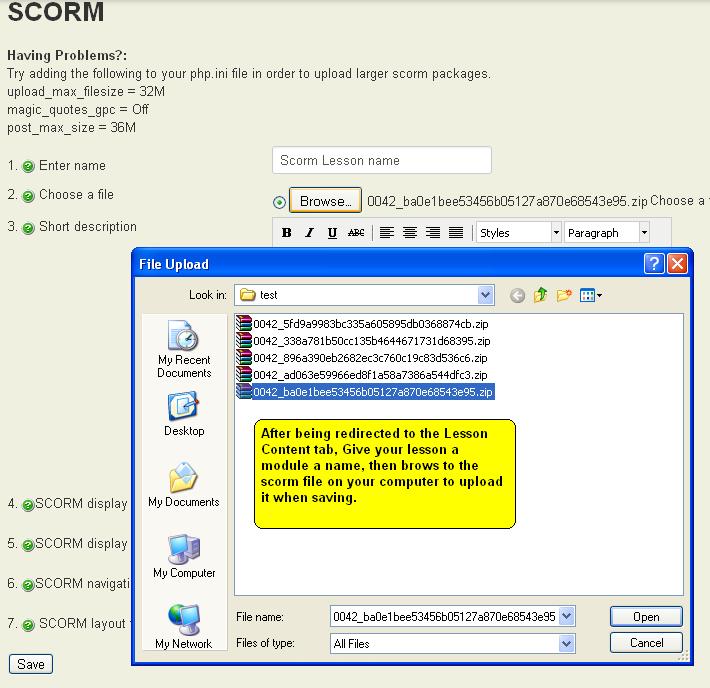
Once you are finished, you will be taken to the Lesson Content tab where you can upload your scorm module.
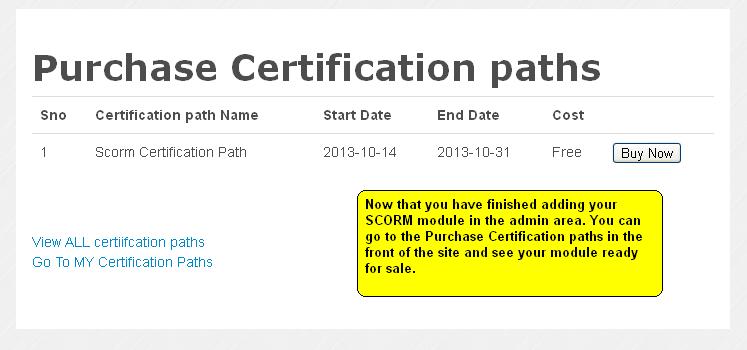
Once you have saved this, you should immediately see your lesson in the Front end of the site as available for purchase.
Robert Joyce
2013-10-16 00:52:02
2014-01-27 22:38:49
4709

