Companies
Learn Joomla from Scratch
If you are new to Joomla! And you have never used it before; it is good you can learn it here. Joomla is a fast growing web application written using PHP, hence you need a webserver to run it. To learn Joomla you just need to convert your computer into a webserver, and install Joomla on it. Installing Joomla is pretty simple, and you to follow the below steps.
How to install Joomla?
You need to install webserver with PHP and MYSQL. Installing a webserver manually is very painful and can easily be done by the help of a free 3rd party tool known as XAMMP. It is a free tool that helps you to install an apache webserver, PHP and MySQL on your computer. You need to download and install it from the link www.apachefriends.org/en/xampp.html.
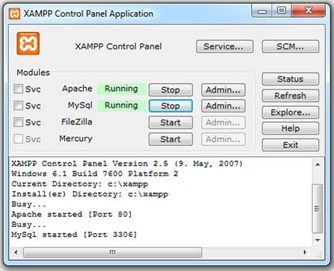
After you have installed XAMMP on your computer, you need to navigate Start--> All Programs--> Apache Friends--> XAMMP control Panel and click on the start button for Apache and MySQL. Now you need to create MySQL database and Account for installing Joomla! You can use a webserver application knows as ‘PhpMyAdmin’, to use PhpMyAdmin, just launch your browser and open http://localhost/phpmyadmin
Step-1
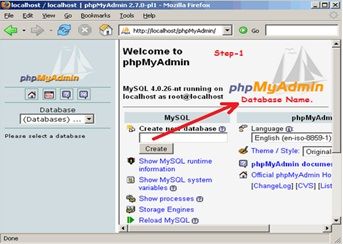
On the front page, you will find the following option to create database. Enter the name of your database you like and click on create. Please note the name you have entered above in step-1, you will require it while installing Joomla!
Step-2
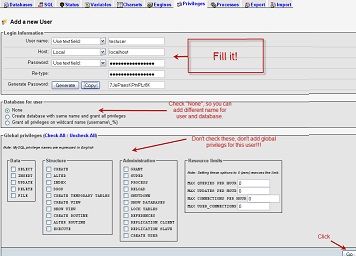
Now it’s time to create MySQL user account. Navigate to Add a MySQL user on the front page, click on ‘Privileges’. Then click on ‘Add a new user’, fill up the form to create an user as shown in above screen.
Installing Joomla! Now that you have already with PHP and MySQL, which you have just created above, let’s install the Joomla! CMS. Download the latest version of Joomla! From Jooma.org
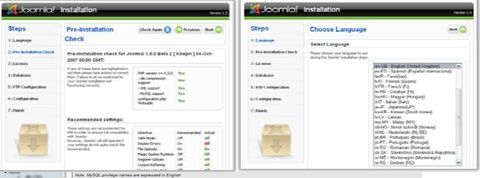
Step-1 Joomla Installation
Save the zip file in root directory of the webserver, it should be like “C:\xampp\htdocs\” make a folder ‘NewJoomlabeta’ and extract the archive in it. Now you can access the file from your web browser by typing address “localhost/newjoomlabeta”, it will show you the installation screen, select the language you want for the installation, and then click ‘Next’.
Step-2 Joomla Installation
On Second Screen will see all the settings of the web server, asking for user name, Host etc.
Step-3 Joomla Installation
Third screen is just the license agreement which you need click ‘Next’.
Step-4 Joomla Installation
Fourth screen is very important for us, this screen specify database setting, username and password. You need to enter the user name and password which you have noted in the first step.
Step-5 Joomla Installation
Fifth Screen will show you the FTP(“File Transfer Protocol”) settings , say ‘No’ and click next.
Step-6 Joomla Installation
Sixth Screen will specify administrator password and site name, you can fill up the site name, administrator email, password and install sample data. As soon as you click sample data you see a message saying “Sample data installed successfully”. Now click ‘Next’ and finish installation.
Congratulation! You have successfully installed Joomla on your computer. Read the next post ‘How to make a successful website using Joomla!”
Install Joomla 3.0 from Scratch
If you are new to Joomla 3! And you have never used it before; it is good you can learn it here. Joomla is a fast growing web application written using PHP, hence you need a webserver to run it. To learn Joomla you just need to convert your computer into a webserver, and install Joomla on it. Installing Joomla is pretty simple, and you to follow the below steps.
How to install Joomla?
You need to install webserver with PHP and MYSQL. Installing a webserver manually is very painful and can easily be done by the help of a free 3rd party tool known as XAMMP. It is a free tool that helps you to install an apache webserver, PHP and MySQL on your computer. You need to download and install it from the link www.apachefriends.org/en/xampp.html
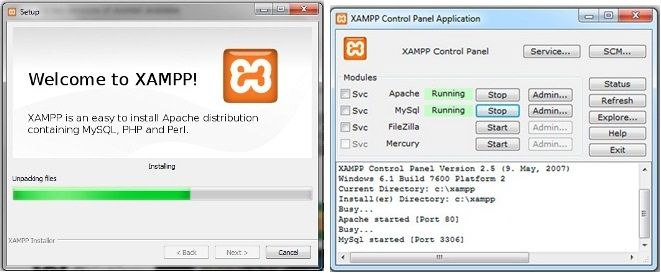
After you have installed XAMMP on your computer, you need to navigate Start-->All Programs--> Apache Friends--> XAMMP control Panel and click on the start button for Apache and MySQL. Now you need to create MySQL database and Account for installing Joomla! You can use a webserver application knows as ‘PhpMyAdmin’, to use PhpMyAdmin, just launch your browser and open http://localhost/phpmyadmin
Step-1
On the front page, you will find the following option to create database. Enter the name of your database you like and click on create. Please note the name you have entered above in step-1, you will require it while installing Joomla!
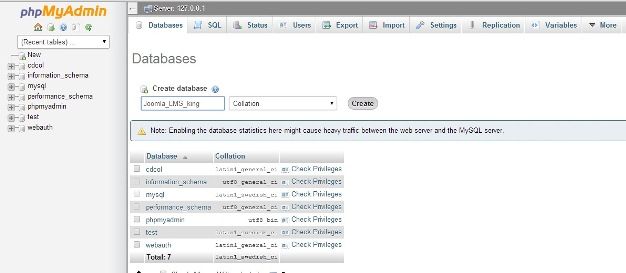
Step-2
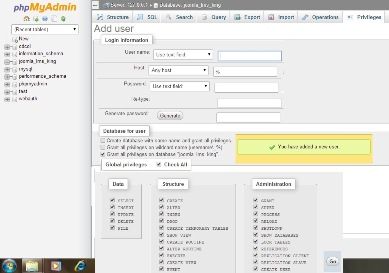
Now it’s time to create MySQL user account. Navigate to Add a MySQL user on the front page, click on ‘Privileges’. Then click on ‘Add a new user’, fill up the form to create a user as shown in screen above.
Installing Joomla! Now that you have already with PHP and MySQL, which you have just created above, let’s install the Joomla! CMS. Download the latest version of Joomla! From Jooma.org
Step-1 Joomla Installation- Configuration
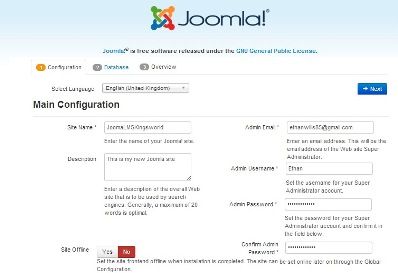
Save the zip file in root directory of the webserver, it should be like “C:\xampp\htdocs\” make a folder ‘Joomla_LMS_King’ and extract the archive in it. Now you can access the file from your web browser by typing address “localhost/Joomla_LMS_King”, it will show you the below installation screen.
- Site Language- Auto identified from the browser.
- Site Name- Enter you site name, I used “Joomla_LMS_King
- Description- Enter the “meta description” this will be used by search engine. Generally 20 words are optimal.
- Admin E-mail- Please enter a valid email address, in case you forget your password. This option will help you retrieve your password in future.
- Admin User Name-Please leave this a default, since Joomla uses “admin” as super user. You can change it latter.
- Admin Password- Try to use a complex password and confirm the password in “Confirm Password box”.
- Site Offline- ‘Yes’ means installation is complete and you are online, else it will display message as 'Site is offline’
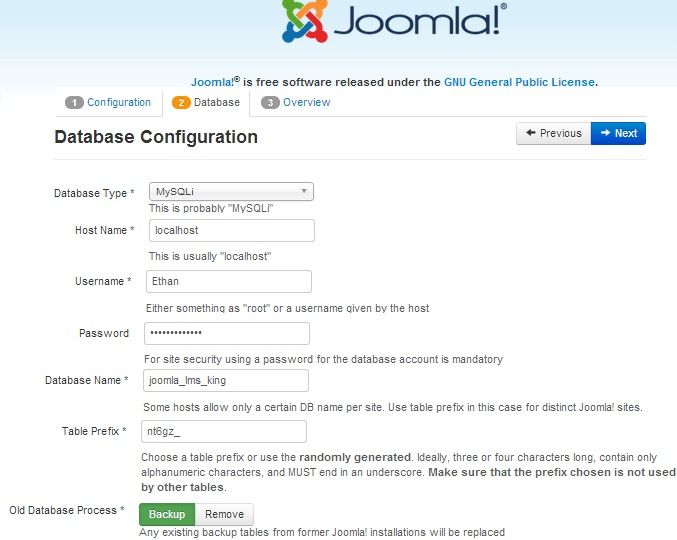
Step-2 Joomla Installation-Database
On Second Screen will see all the database settings, this is very easy settings.
- Database Type – MySQLi is the commonly used database.
- Hostname – here it is ‘Localhost’, but depends on address of your host.
- User name & Password – Used to connect to database.
- Database – Is the name of your database.
- Table Prefix – Table prefix is automatically generated. You can always change it, but remember to use special underscore ‘_’ at the end.
- Old Database Process – Leave this option unchanged for the time being.
Step-3 Joomla Installation- Finalize
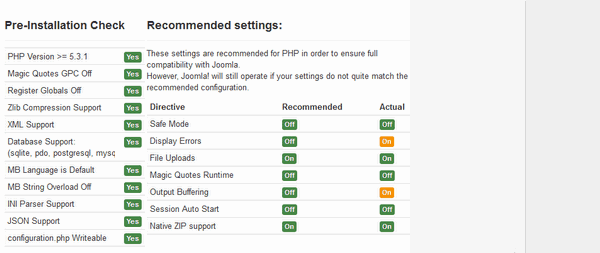
Now it is time to finalize your Joomla Installation. Since you are new to Joomla! You can select sample data, to know how Joomla websites works. You will find a default being selected as “None”. Second part of this page will take you to the re-installation checks. You can check the installation steps. And finally you see the “Congratulation!” message, here you need to remove installation folder. This folder is removed for security reason; you won’t able to see your site unless you remove this folder completely!
Congratulation! You have successfully installed Joomla on your computer. Read the next post ‘How to make a successful website using Joomla 3!”
Know your controls in Joomla 3!
Joomla is an open source content management system (CMS), which helps you to build website in just few clicks. Joomla uses MySQL to store data and it is second most preferred CMS after word press. The main aspect is it’s easy to use interference and extensibility. The best of all, is its open source and freely available to all.
Since you have already installed Joomla 3; It’s now time to reset password, if not please read the previous post. To login into Joomla 3 administrative panel, you need to navigate to http://yourdomain.com/adminstartor in your browser. On this page you will find a login screen, asking for ‘username’ and ‘Password’. You need to enter ‘username’ and ‘Password’ which you have already while installing Joomla 3! To benign with website building you need to navigate to Joomla admin tools under the Joomla tool tab. Once you locate your site you need to ‘reset password’ to gain access. The header stating ‘site name and URL’ will expand and will allow you to select a group ‘superAdminUser’, to change the password.
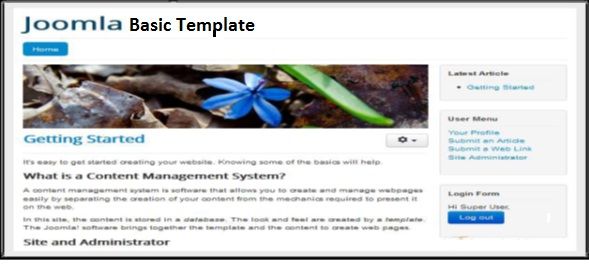
With Joomla 3! You can select sample data from several sample data sets, which was previously not possible in Joomla. Depending on your needs you can try the data set, but unfortunately you cannot switch between different data set. The frontend your website would look something like as below.
But the backend is the administrator area, where you control your website. Access is provided via special login page. After the successful login you can see the dashboard.
Let’s consider what Joomla is made up of? Joomla contents mainly consist of articles, categories, tags and media. Articles are the main building blocks for Joomla! Website, the front end easily recognizes the text published in the backend.
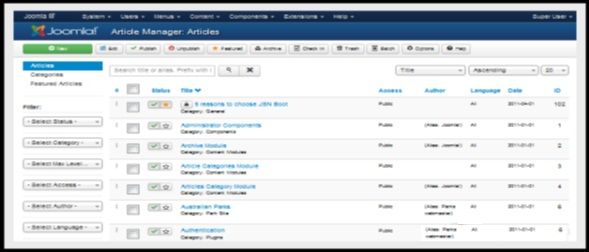
Articles- In the backend you can create article, edit them, and decide whether to post them publicly or not with the help of “Article Manager”, you can access article manager from ‘Menu’--> “Content” --> “Article Manager”.
Contents- Contents helps you organize article more precisely. For Example a category ‘Product’ will contain all the product details of “King Products” or Category ‘Support’ will contain all the blogs and learning modules.
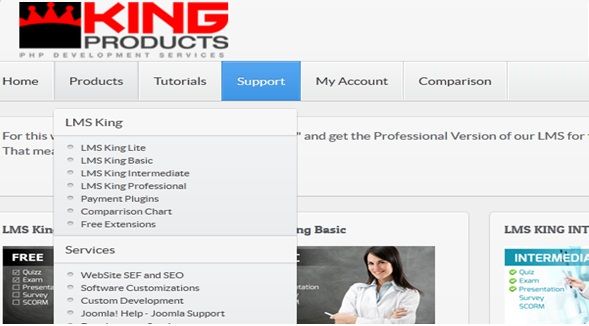
In the backend categories are managed using the “Category Manager” easily accessible from “Content”--> “Category Manager”.
Tags- Tags are also known as keywords which are assigned to a piece of information. It can describe the content of an Item, for an example you might add the tag “Joomla LMS Solution”, “Best Joomla extensions” to your article. Item with similar tags will group up together, so that people can search them easily.
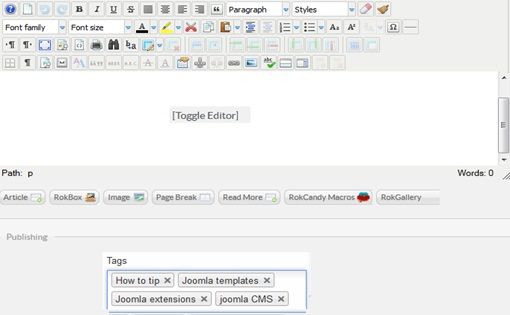
You can easily manage tags from “components”--> “Tags”
Media- This is more of handling non-textual stuffs likes videos, basically handling multimedia events. Media can be managed using the “Media Manager” from content menu.
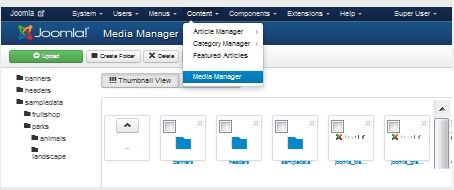
You can upload manage media folders, files and can even create new medias. In the next article we will discuss in details how to use them all.
Joomla 3 SEO tips you would never like to miss
Are you looking for tips on how to optimize your Joomla website? Then this article is worth reading. Search engine optimization been swift shift over past couple of years, techniques worked efficiently in past are now inefficient. Many a cases they hurt your website ranking too. This blog would outline few very important tips and tricks.
Just like other sites, Joomla! Websites also requires optimization to improve its ranking in SERPs (Search Engine Result pages). Below tips are more oriented toward CMS sites like Joomla CMS. The concept of SEO is quite old, in order to give a good start to your Joomla website, you need to consider the content used in your web pages, as soon as you add your website to world wide web search engine like Google will send its spiders to harvest contents from your web site. Contents created by JavaScript’s, Flash files etc. are never harvested by spiders. They may look good but the visibility to your websites gets impacted to a great extent.
- Website ranking must be thought prior to its make- Just like the security feature of your website rakings should also be thought in advance. You should consider its content sorting based on the categories. Search engine friendly URL’s (SEF) or clean URL’s can easily be explored by search engine, Joomla is capable of creating clean URLs. To make this more clear let’s have look over the two examples.
 SEF’s option is present in Joomla 3 and can be turned on from ‘Global Configuration”.
 - Keywords Rich high quality unique content- This is most important parameter in your website ranking, always create a high quality unique content with rich keywords in them. Unique content will help you to get more clicks and search and avoid keywords repeating.
- Always try to use a Title Tag- Title tags can become clickable in search result. Google advice to use descriptive and unique title one every page. Using Title tags and Meta tags helps search engine to reach your content. Meta data settings are present under Global configuration of Joomla setting. The two important elements of Meta data are “Title Tag” and “Description Tag”, try to keep the title tag around 70 words and description around 150 words.
- Try getting both external and internal links – Blog posting in external website is a good idea to drive traffic to your website. Ideally a good website should have both external and internal links.
- Use SEO Plugins – One of the benefits of Joomla website is the easily availability of plugins, lots of SEO plugins are easily available in the market like “Easy Front SEO” this is free tool where you can control Meta data automatically.
Joomla 3 is world of possibilities; you can find different plugins starting from LMS to payment gateway. If you don’t find one you can always make one yourself. Additionally you will get advice, supports and learning’s from different blog.
What makes Joomla CMS a perfect E-Learning solution?
E-Learning is going to be future of education, with the advancement of technology and internet. WWW has broken the barriers of education system, this has made possible to learn anywhere any time. We know we learn in different ways and different times. To support the training needs, you will need e-learning delivery methods. Many organisation and educational institution has already selected e-learning approach and have setup e-learning websites. Sooner or later, the question of right Content Management System will definitely arise, and trust me it is very difficult to on decide right CMS (Content Management System), it is totally dependent on review and analysis on the right CMS. There are approximately a millions of companies offering for CMS, over the internet and some of them are open source. By the term open sourced means you can edit them depending upon your need. For an example Joomla is open source CMS software. Let’s see what makes Joomla different from other content management systems.
Why select Joomla CMS for E-Learning platform?
- Open sourced – As mentioned above Joomla is an open source CMS, and it is flexible in nature. You can easily add modules, plugins and components which will increase website functionality. Moreover most of the plugins, templates are free of cost and available in internet.
- CMS is absolutely free - Joomla CMS is free and you can download and use it for your ‘CMS’ requirements. “Joomla is not just software it is a community”.
- Joomla Update – At Joomla, the developer are constantly working to improve its functionality and the features, you can see the number of release being updated. The recent one is Joomla 3.3.3, the best part is that, you can easily migrate your website to the latest Joomla version by the help of upgrade packages available at http://www.joomla.org/
- Joomla LMS – Joomla LMS can quickly integrates with your website. There are dozens of LMS solutions available in the market, some are free with limited functions and some are commercial with number of features. The most popular one being “LMS King Professional”, the decision of selecting the free or paid versions solely depends on your needs.
- Easy E-Commerce solution – E-commerce means exchange of goods and services, usually for money. If you have an E-Commerce idea, you probably need a payment system. Joomla offers e-commerce plugins system, which helps you accepting payments in return of sale of services. You can set different payment methods depending on your suitability.
The above listed features make Joomla CMS worth implementing and you can leverage the Joomla CMS platform to make highly interactive E-Learning website.

