Companies
Frequently Asked Questions - Registration Manager King
Installing the Software
Event Registration Manager King uses the same installer system that jomsocial uses. It will install the complete package, consisting of all the main extension and additional plugins and modules as well as the library packages. There is no need to download the extensions one at a time now as we install them all for you. During the installation process, you also have the option to install sample data.
The install package is 10Mb so, you will need to set your PHP settings to allow the upload of this size.
To install Joomla extensions, you need to folow the satandrd installations steps, which are as follows:
- Login to your Joomla! admin area and go to the control panel if it is not already open.
- From the top menu, go to Extensions and then Extension Manager
- Select the Install Option. Then you can drag and drop the installation package into the joomla web page to have it start installing.
- When the page loads, you will see a green button to Start the Installation process.
- When you click on the big green button you will see that the installation page will automatically go through each of the installation process steps. When it has finished, you can opt to install sample data.
UPDATING
NOTE: WHEN YOU ARE UPGRADING, YOU DO NOT NEED TO UNINSTALL THE OLD VERSION. THE PROCESS WON'T TOUCH YOUR DATA. The process won't delete your database. It will only replace the files, so the database tables won't be deleted.
In order to upgrade to a new version of Event Registration Manager King you just need to go to the joomla Extension manager and select Updates,, then the new versionshould be listed if it is available. Just select it and click the Update button to get the latest version.
The My Account area of king-products.net will always have the most recent version available if your support license is still valid. After you have downloaded the latest version from your account, you can just perform the same steps as before. The update will automatically overwrite the files for the main component, modules, and plugins as well as update the database. NOTE: If you have made any modifications to the core files of the extensions, then they will be overwritten. Alternatively, the core component can be upgraded using the Joomla installer built into the CMS
Uninstalling the Software
If you need to completely uninstall Event Registration Manager King, you can simply uninstall the component, and then the plugins, modules, etc. using the Joomla! extension manager
The database tables for the extensions won't be deleted when they are uninstalled.
To remove the tables, you will need to do it via phpmyadmin or another database tool.
registration manager King has an extensive list of configuration options. Here we will explain the purpose of each option in each tab so that you can configure it to display data how you need.
GENERAL SETTINGS TAB
Currency & Tax Settings
We have added a complete list of all the world currencies. When you select your currency, the Currency icon will appear. This is the icon that will be shown to the user in the front end.
If you want to charge your users tax on their purchases, this is where you set the tax for the cart total.

INTRO TEXT SETTINGS TAB
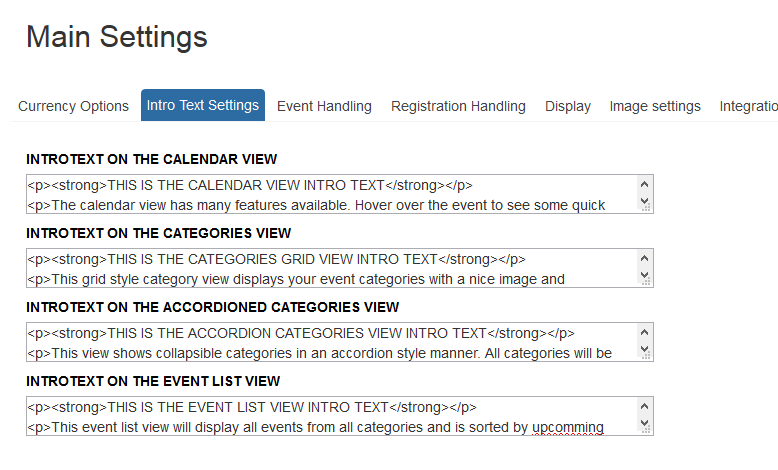
Intro text can be displayed in category, calendar, accordioned categories, and event list front end views, Here we have listed each of them so that you can enter the intro text seperately for each. This intro text is visible in the front end.
These fields are not required. So leaving them blank will result in them not being visible.
EVENT HANDLING TAB
Here is where you set the events that the system can trigger.
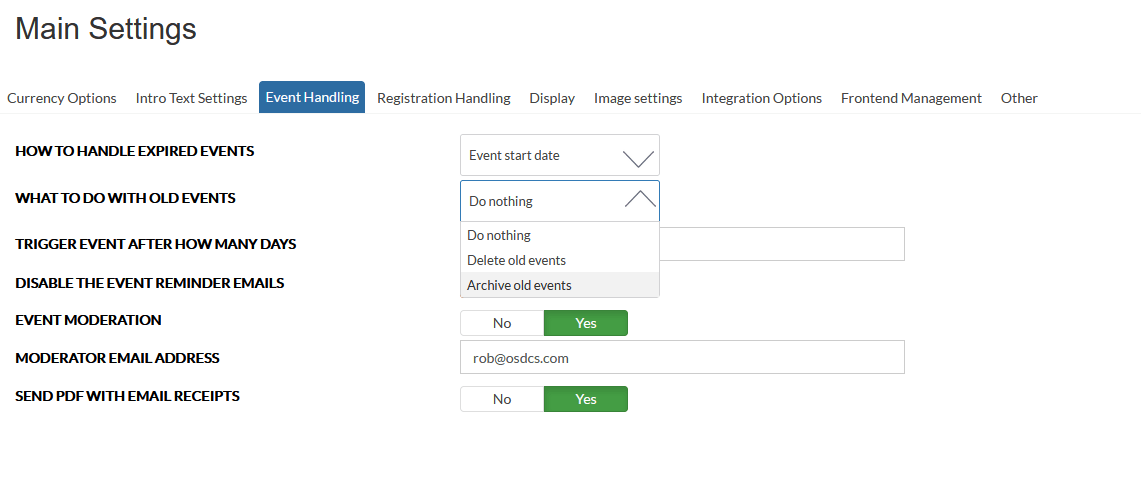
- Handle expired events By: Expired events will be archived in the archive manager section. Here is where you specify How to determine when to archive them, IE, by referring to their start date or their end date. It is unlikely however that you would archive an event based on it's start date, as it many not have completed yet.
- Handle expired events: Here yous specify what you will do with the expired events. You can archive them to archive manager, you can delete them, or you can do nothing with them, just leave them be.
- Number of days: Here is where yous et the period after the set start er end date for triggering the expired event event. So, if you have set this to 10, and the By option to end date, and the what do do option to delete, then 10 days after the event expires, it will be permanently deleted from the system. NOTE: If you have used the recurring feature and there are child events, The events will only be unpublished when the last child event has been triggered, this way, the entire event and its copies can be archived.
- Disable event reminder notifications: If you dont want the system t send you emails notifying you that an event has been archived or deleted, then set this option to NO.
- Enable Event moderation: With this option set to yes, all events created by the event content creators int he front end, will be set to unpublished automatically, until the admin of the site has authorized and published it manually. The moderator will be send an email accordingly.
- Moderator email address: This is where you set the email address of the moderators, you can comma separate them.
- Enable PDF receipt with email: Here you can set the system to send a PDF receipt to the user at the time that they register for an event. It will be send as a file attachment to the email.

REGISTRATION HANDLING
- Notify on Register:
This email address will be notified when a new user registers for an event. - Require Registrations:
This option will require all users to be logged in when they register for events. Meaning, No Guest Checkout. - Allow duplicate emails:
Witht his option set to "yes", users can register using the same email address multiple times. - Accept users by default for free events:
With this option set to "yes", users will be automatically accepted to events when the event is free. If it is set to "no" then the event registration will be set to pending. - Autimatically accept payments as completed when using offline payment method:
If your event uses the offline payment method, setting this optjon to "yes" will mark the payment as completed automoatically, otherwise it will be set to pending.

DISPLAY SETTINGS
General Display Settings Section
- Default number of events per page in the list view: Enter a number of how many events will be displayed on the lists per page. EG: 20 events per page.
- Background Color for Featured Event: Select the color you want to use as the background color of your featured events. This color will be used in the event lists as the background color of the event if it is marked as featured.
- Featured Event Text Color: Here you select the color that you want for the text to be for the featured events. If you have a dark background color selected, then you should select a lighter color for the text text color so that the listing can be read.
- Show event start/end dates: This will show or hide the event dates from the list view.
- Show event start/end times: This will show or hide the event times from the list view.
- Display location: This will show or hide the event location from the list view.
- Show short description: This will show or hide the short description from the list view.
- Show event category: This will show or hide the event category from the list view.
- Show max capacity of the event: This will show or hide the maximum capacity number from the list view.
- Show remaining available capacity for the event: This will show or hide the remaining available capacity number from the list view.
- Show amount of registrants for the event: This will show or hide the number of registrants from the list view.
Event List View Section
- Default number of events per page in the list view:Enter the number of items to show per page. EG: 10 events per page.
- Featured Event Background Color: To show an event as Featured, it should stand out from the rest. To do this, you select a background color for it.
- Featured Event Text Color: If you set the background color of a featured event, you may need to change the text color too so that the text can be seen on the background.
- Show event start/end dates: If you dont want to show the events dates, then you can hide them here.
- Show event start/end times: If you dont want to show the events times, then you can hide them here..
- Display location: To hide the event locaiton field, set this to "No".
- Show short description: In List view, if you want to show the short description for an event, you can set this here.
- Show event category: In List view, if you want to show the category for an event, you can set this here.
- Show max capacity of the event: This will show or hide the maximum number of seats for an event.
- Show remaining available capacity for the event: This will show or hide the remainingnumber of seats.
- Show amount of registrants for the event: This will show or hide the number seats already booked for the events.
Event Calendar View Section
- Show calendar category filter:On the calendar page, show the category filter.
- Show event thumbnail image in calendar under the event title: If you set this to yes, you will show a small tumbnail from the event under the events title. This should be avoided if you have alot of events.
- Span events from start to end dates in calendar view : This will blockout the enter time that an event is running, on the calendar. You should only use this if your events don't overlap as it could get messy.
- First day of the week for the calendar view: Use this to est the first column of your calendar day to Eg: monday or Sunday.
- Show max event capacity available on event detail page: Show the maximum number of seats for the event.
- Show available seats for event on detail page: Show the remaining number of seats.
- Show amount of booked registrants on event detail page: Show the number of seats already booked.
- Show registration dates on event details page: Show or hide the event registration dates.
- Display event description on event detail page: Show or hide the event description.
- Display event title on event detail page: Show or hide the event title. Hiding it is not advised as google then can't find it.
- Show location on event details page: Show or hide the event location.
- Show location URL on event details page: Show URL of the location on the event detail page.
- Show Link to Google Maps for the location: Show or hide the link to the location in google maps.
- Show category: Show or hide the category.
Event Categories Grid Settings
- Default number of categories on front end: Set the number of categories in each list in the categories list pages.
- Category Per Row: Set the number of columns in each row.
- Show Category Image: Show or hide the category image.
- Show Category Name: Show or hide the category name.
- Show Number of Events: Show or hide the total number of events int he category.
- Show Short Description: Show or hide the categories short description.
- Show View Events Button: Show ir hide a button linking to the categories events list.
Shopping Cart View Section
- Maximum quantity limit: Setting this option sets the length of the selector field because if an event has 500 seats, you dont want the user to see a selector with 1-500 items in it when going through the checkout.
- Allow registrants to add multiple events to the cart: This option allows user to go back from the checkout and add another event to the cart.
- Enable discount code field on cart:Show or hide the discount field.
- Show mandatory fields alert above register button: Dynamic form validation so that the user sees any equired fields that they have missed prior to dubmitting.
IMAGE SETTINGS TAB
These settings will resize your images upon upload to the dimentions set in these parameters. If you change these settings later, it will not automatically resize your existing images that have been previously uploaded.
You can set the image height and width if you want to. You can also set the height to be auto and the image will be properly sized only based on the width setting.
INTEGRATION OPTIONS TAB
Note: This is an optional setting and not needed for most websites.
Are Joomla Extended Profiles, JomSocial, or Community Builder being used?
This option allows the user profile links to point to the specified component on your site. So if you have JomSocial installed, then you can link to the users JomSocial profile.

FRNOTEND EVENT MANAGEMENT TAB
- Front End selectable categories: When creating an event in the front end, this is a list of the cattegories that will be available to the content creator to choose from.
- Front End selectable Locations: When creating an event, this will give the list of already created and allowed locations for the content creator to choose from.
- Front End selectable Forms: This will show the front end content creator a list of already predifined event registration forms to select from.

OTHER TAB
Google Maps API - Here is where you can find the options that couldn't be groups with others, so we put them together here.
Google maps API, you will need to options this from your google Console. Log into your google account and go to the console. At the time of writing this document, the URL was this. https://console.cloud.google.com/google/maps-apis/overview?project=geo-radius-search
However, that could change at any time with google. You will need to option the Javascript Maps API key from here.
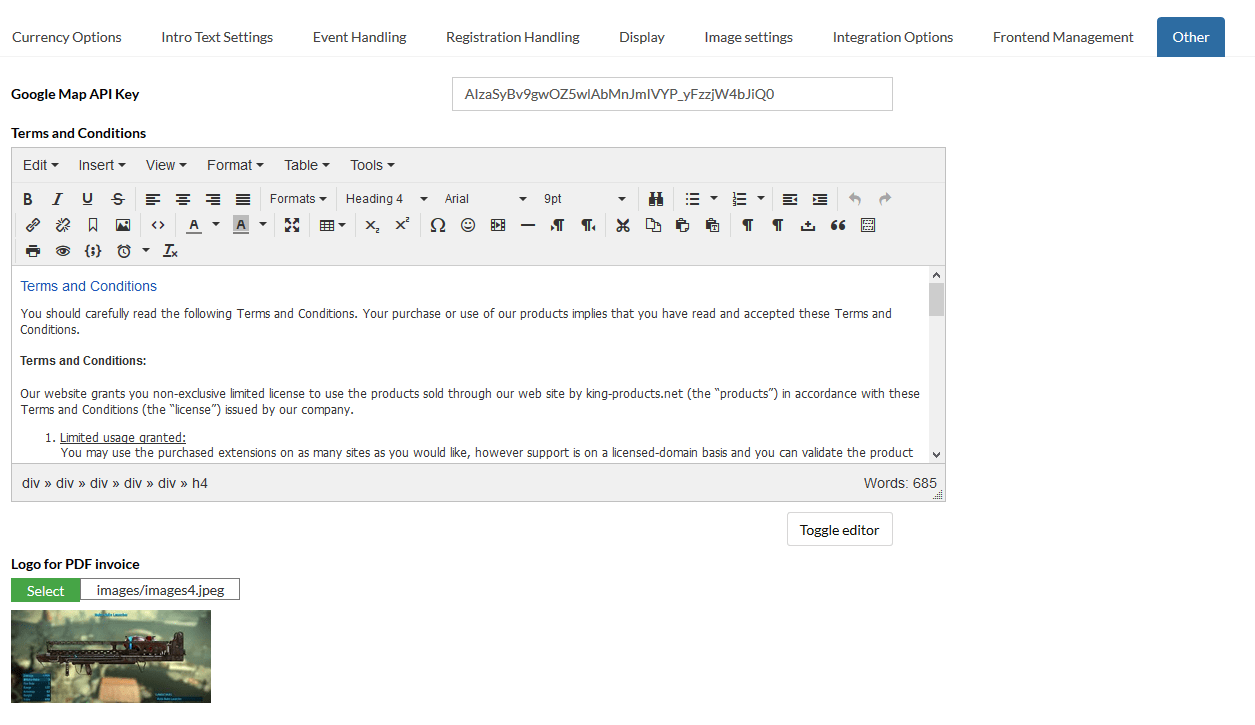
- Terms and Conditions - Terms and conditions are the restrictions and rules that you provide to yoru clients when they are making a purchase from your site. The users must agree to these in order to complete the checkout process. This option is the GLOBAL option that will be used if an event does not have its own. The terms are shown to the user when the click the link during the checkout process.
- Logo For PDF Invoice - When sending the user their purchase emails, the system also sends an invoice in PDF form. Here is where you specify the logo for that invoice.
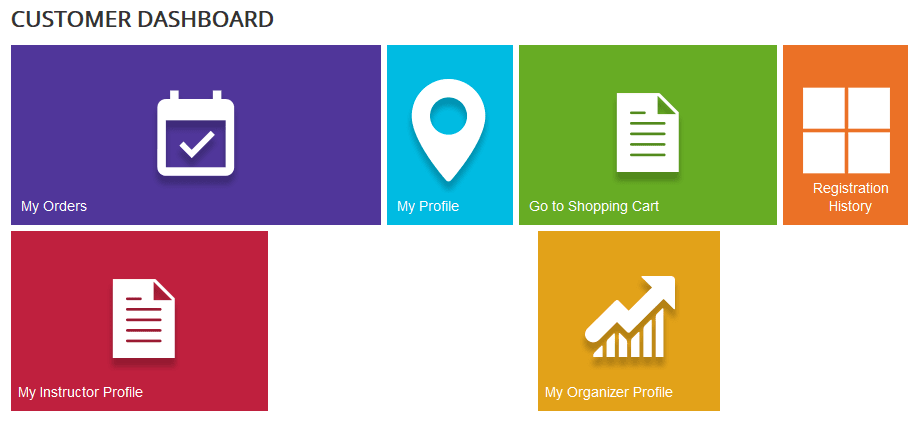
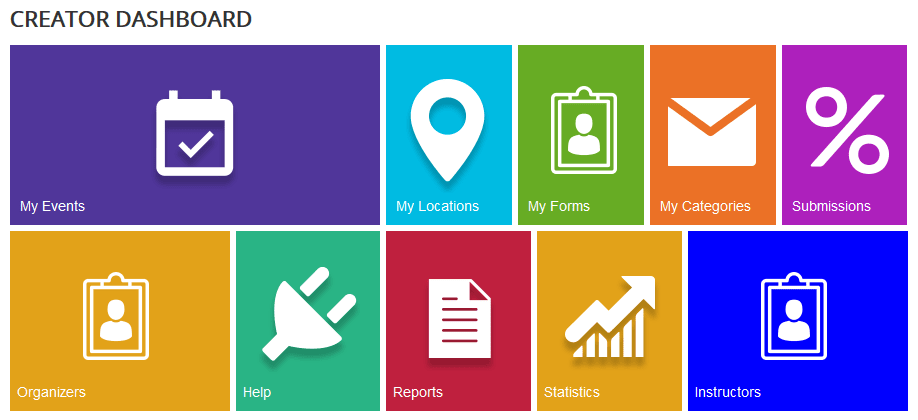
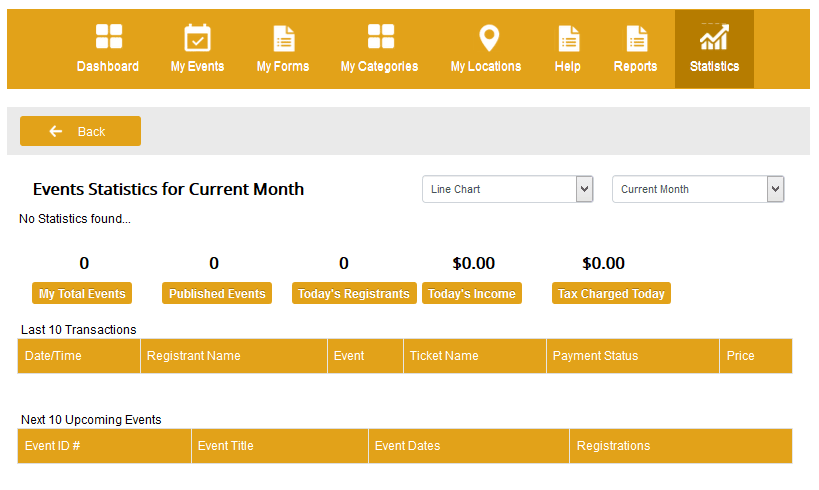
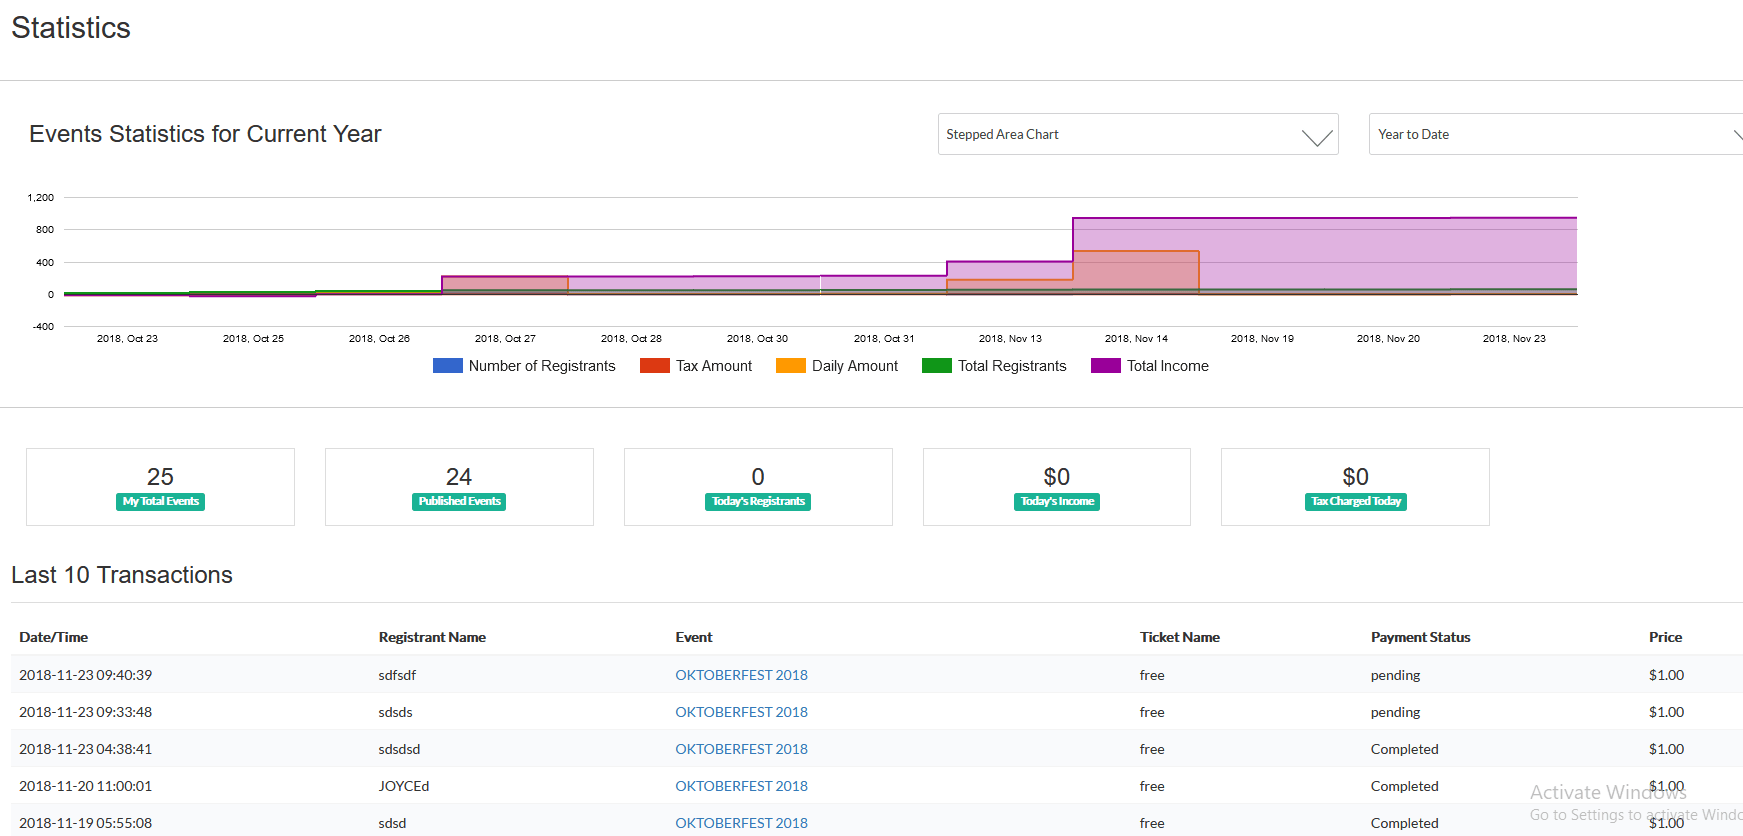
The Registration Manager King Component has 3 dashboards. Once for Admin in the admin area, one for content creators and one for customers, both which are in the front end of the system. Frome the admin dashboard, you can havigate to every part of the system.
A description of each Dashboard tile is listed below.

Listed below are the optiosn for the system configuration, which can be navigate to by useing either the tabs, in the Configuration page or the left menu which conveniently hides after selecting an option.
-
Configuration - As the Title says, this is where the main configuration options for the system can be set. Here you set the default settings for the options that are used within the system.
-
Main Settings -The main settings have been split into 9 groups, which are shown on tabs, to provide easy access to them.
- Templates for System generated Emails -
Main Admin Confirmation Email Setup
Event Admin Confirmation Email Setup
Confirmation Email Setup
Status Change Email Setup
Reminder Email Setup
Registrants Email Setup
Moderator Email Setup
Pending Registrants Email
-
-
Events - Front here, you canselect one of the 5 sub menus to control and create yoru events.
-
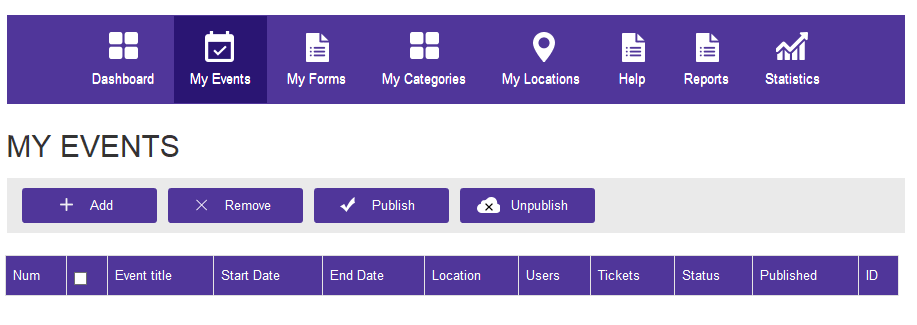
Events - The Events List page will show you the complete list of the events that you have created.
-
Event Categories - From here you cn crete your own categories so that you can group them. You can even set color coding schemes for them.
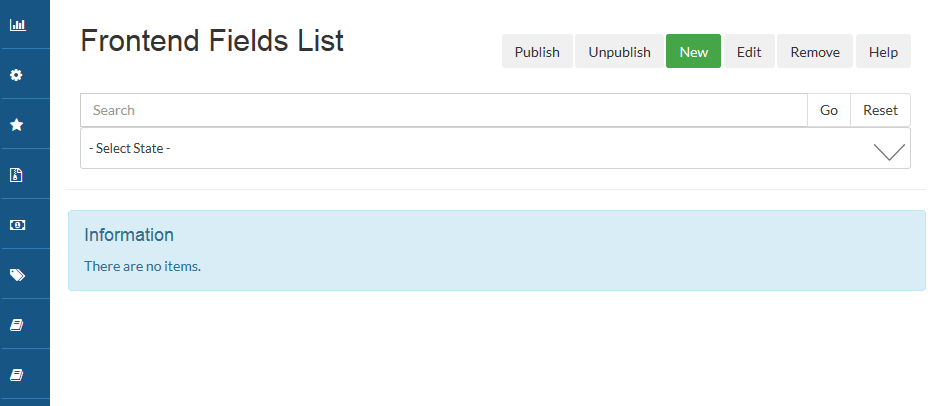
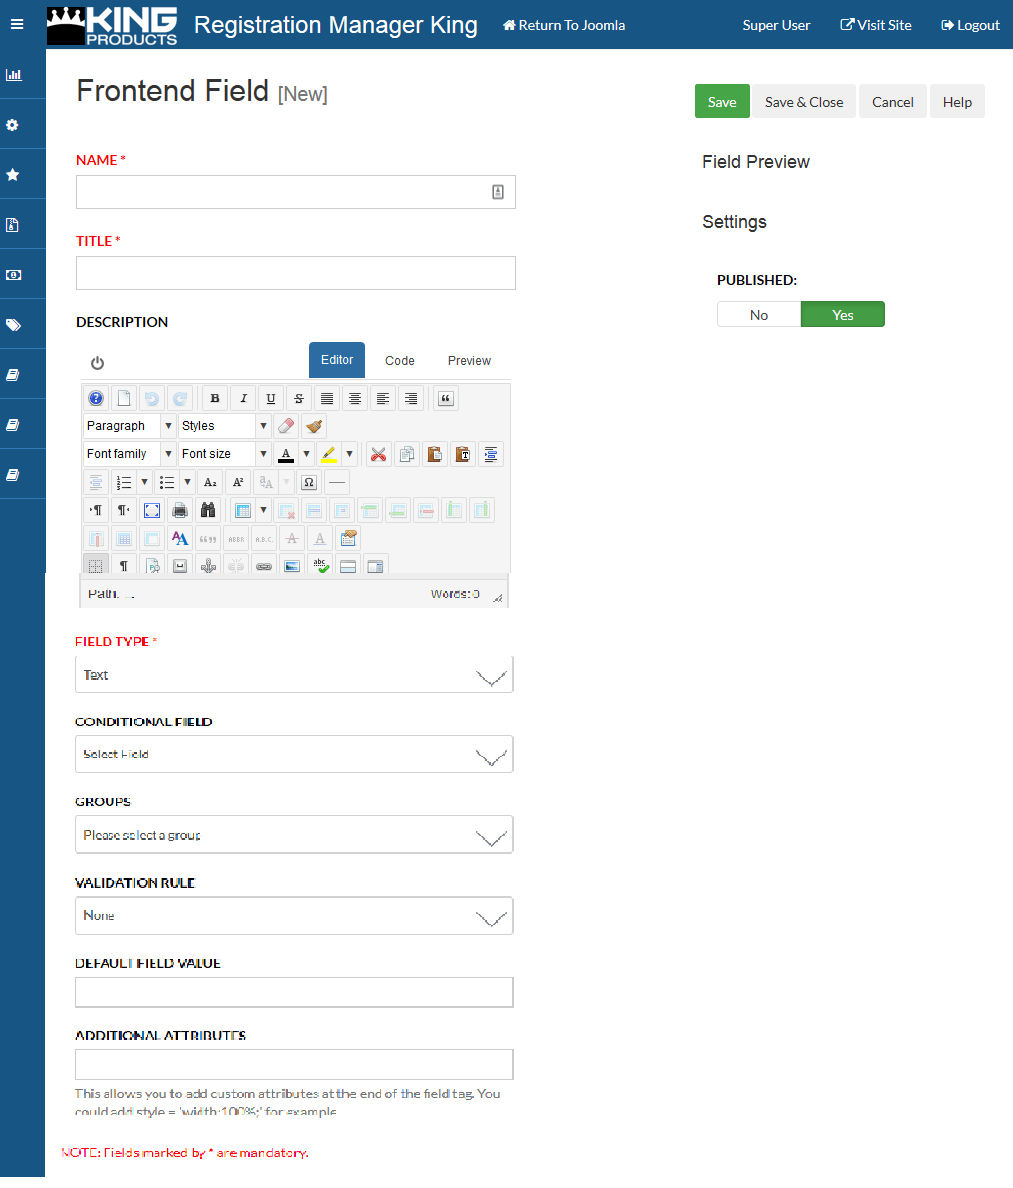
- Front End Fields - If you are planning to use the front end management part of the system, here is where you create the fields that the front end managers can use in their registration forms.
-
Registration Forms - Registration forms are one of the most important parts of the system. Here you can create them and customize them as needed.
-
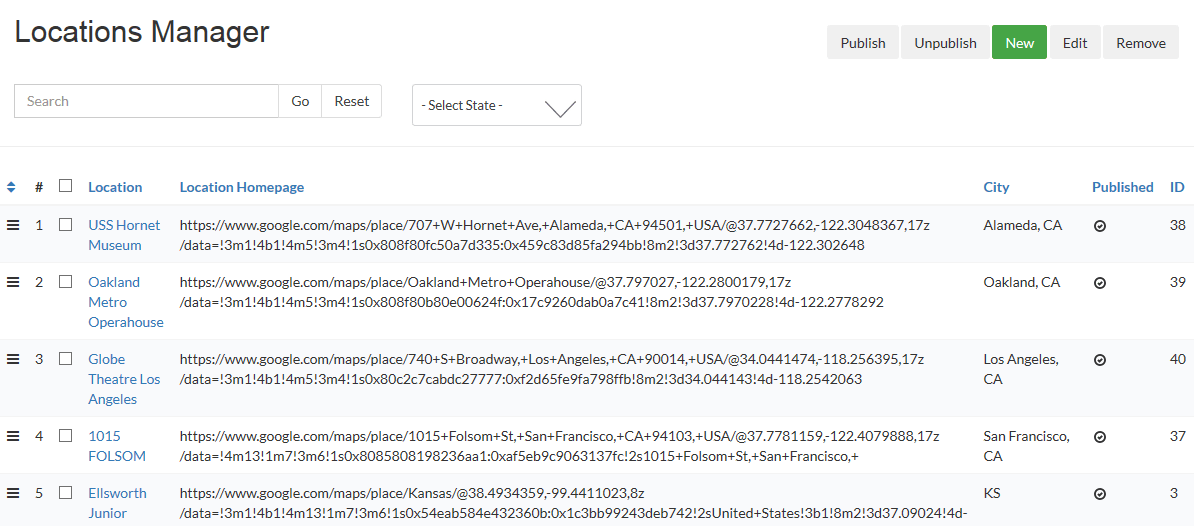
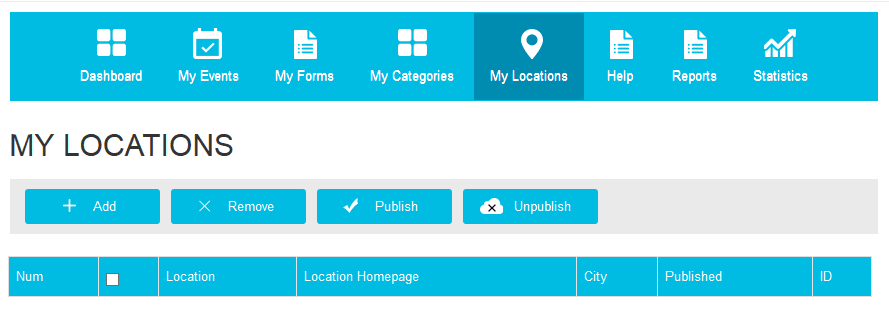
Location Manager - Here you can setup all the locations where your events will be taking place, so that when recreating an event at the same place,, you don't need to set up all the maps and address details again.
-
- Archive Manager - When events expire or are configured in the settings to expire, they aren't deleted, they are archived in the Archive Manager. Here you can restore them too.
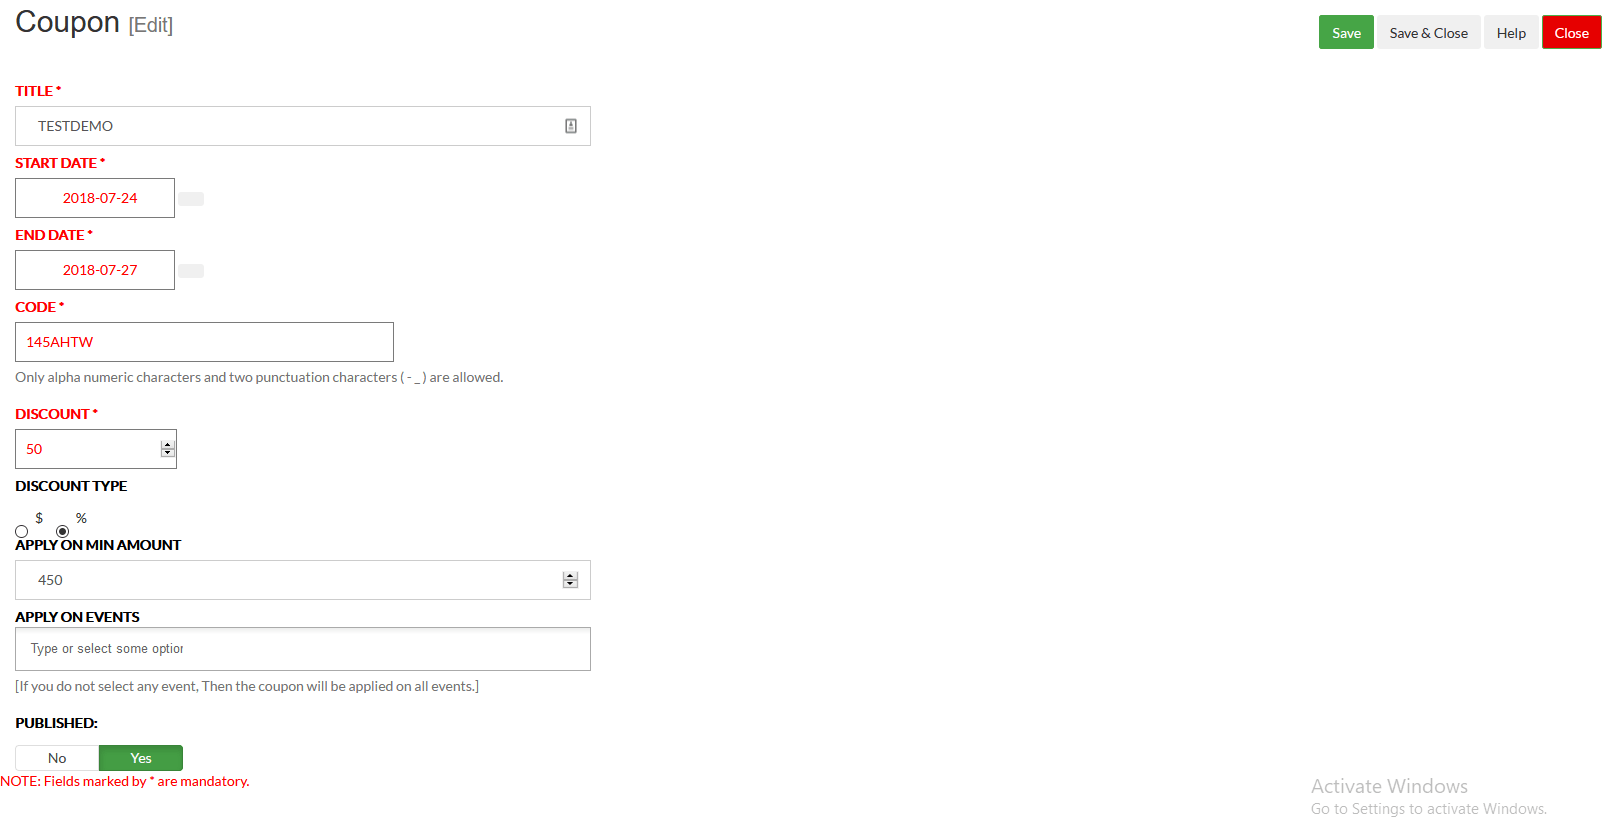
- Discount Coupons - Discount coupons canbe used by users during the checkout process. Here you can create them for each event and set them at a percentage of the cart price or a set dollar amount..
- Payment Plugins - Selecting this option, will take you to the list of payment plugins that are installed. You can even have additional payment plugins developed as normal joomla plugins and they willshow here too.
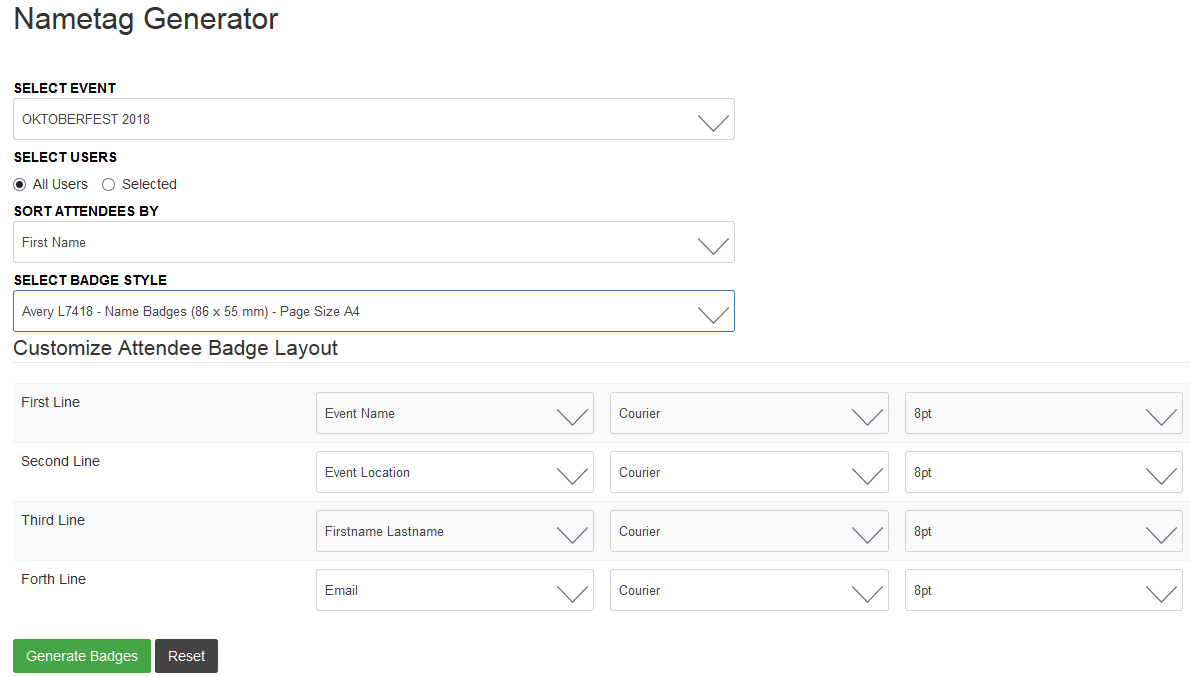
- NameTag generator - You can print nametags for your guests too. This needs to be done by admin currently, but in the future, it will be available to event owners in the front end of the system.
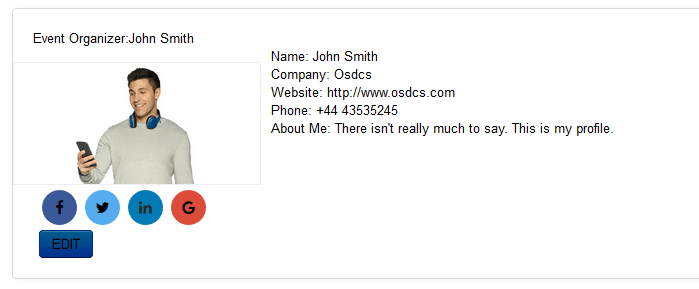
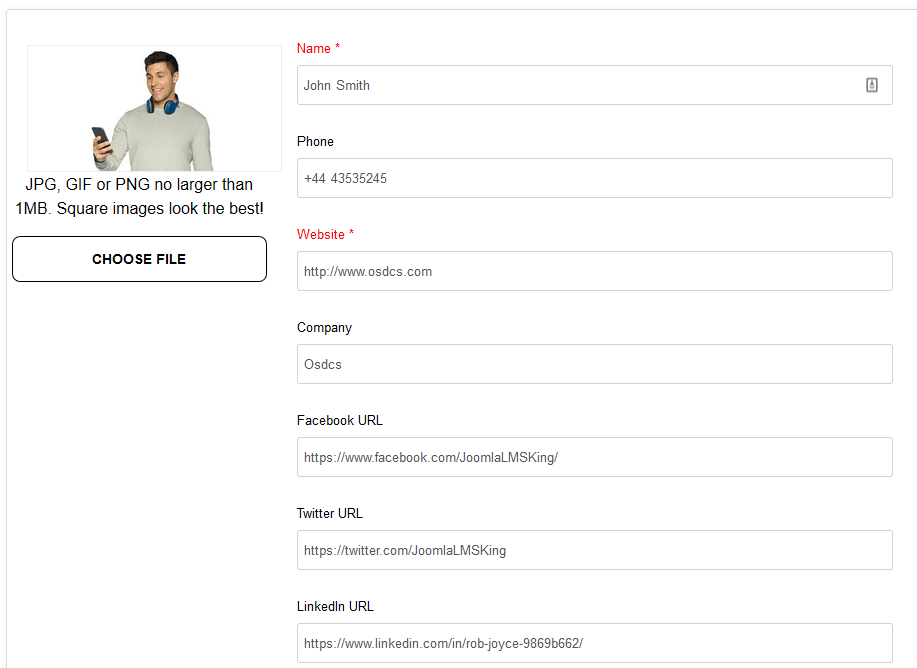
- Organizers - This will allow you to add, edit ,delete or view the organizers. Each person will have their own personal profile page int he front end where they can login and edit the profile. Front end content creators can also manage these accounts.
- Instructors - This will allow you to add, edit ,delete or view the Instructors.Each person will have their own personal profile page int he front end where they can login and edit the profile. Front end content creators can also manage these accounts.
- Orders - On the orders page, you can see the entire list of purchases by users. If orders are in a pending state, eg from offline processing, you can change their status to Completed too. You can also Delete or Negate orders, returning the number of booked seats back to the event so that someone else can book the seat.
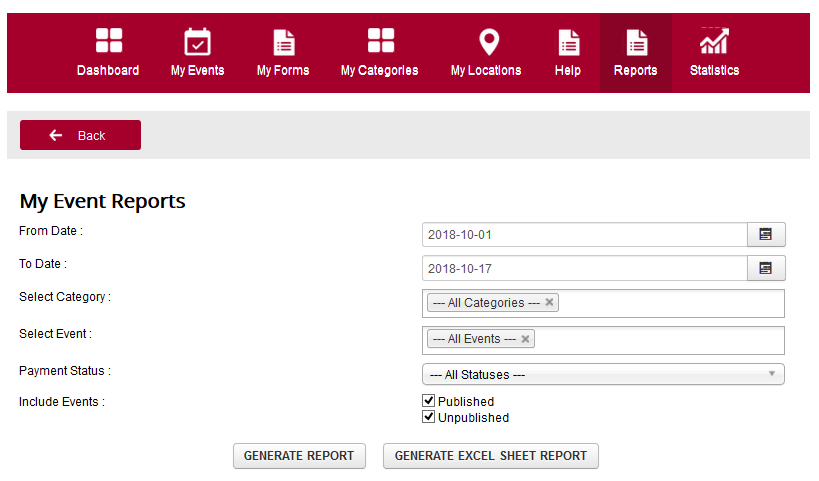
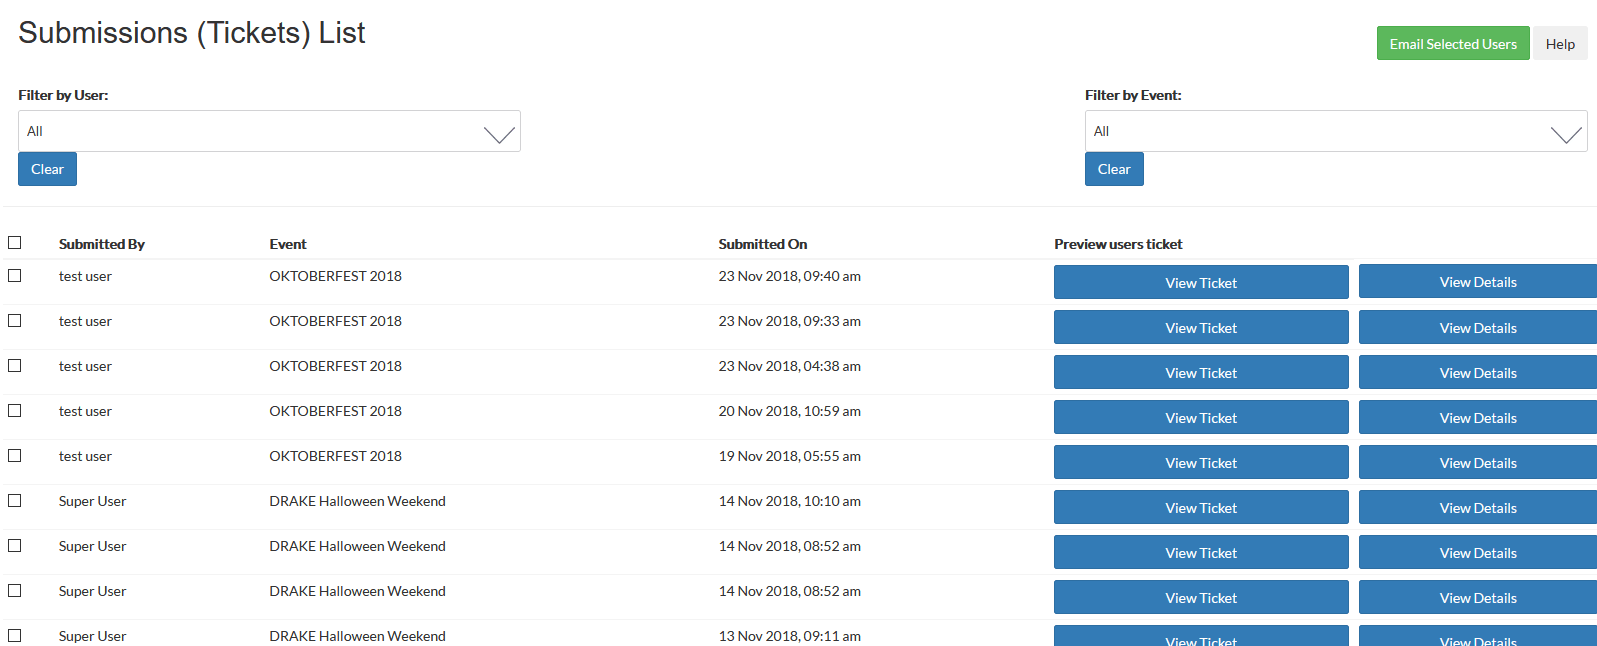
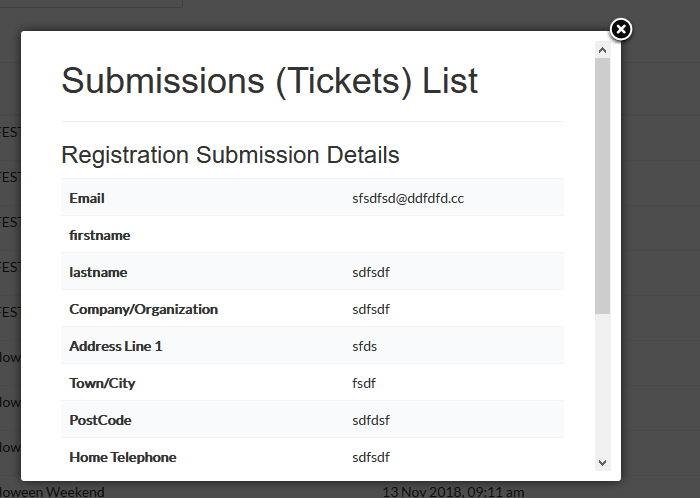
- Submissions - Here is where you see all of the registration submissions from the users.
- License Manager - You will need to enter your license code in order to obtain support for the extension.
Many people if not, MOST, like to just jump in and start using things without reading the documentation. I know, I'm oe of them too. So, to forwarn you, here are some things you'll need to do in the component first before you can create any events.
These are the required first steps you need to take.
BEFORE YOU CREATE AN EVENT! The system will prompt you do perform these tasks.
1. Create the event category
2. Create a venue location
3. Create your registration form
4. Publish your payment plugin
Once you have done these items, you can create an event. Any event will require the above items be done before you can create your first event.
For the rest of you that really like to follow more detailed instructions please continue on with reading this documentation.
Managing Event Registration Manager King Categories
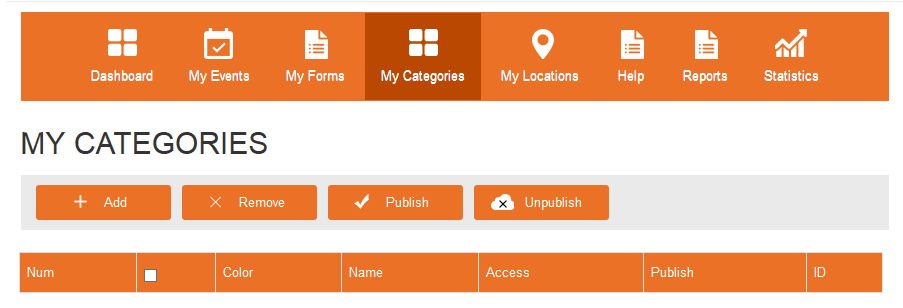
Event Registration Manager King allows you to create unlimited categories. Each event must be assigned to a category.
Each category can be publish or unpublish as needed. If a category isn't assigned to any events it will not show up in the category list views in the front end of the site. If a category is not assigned, it will not be hidden in the Category Grid View.
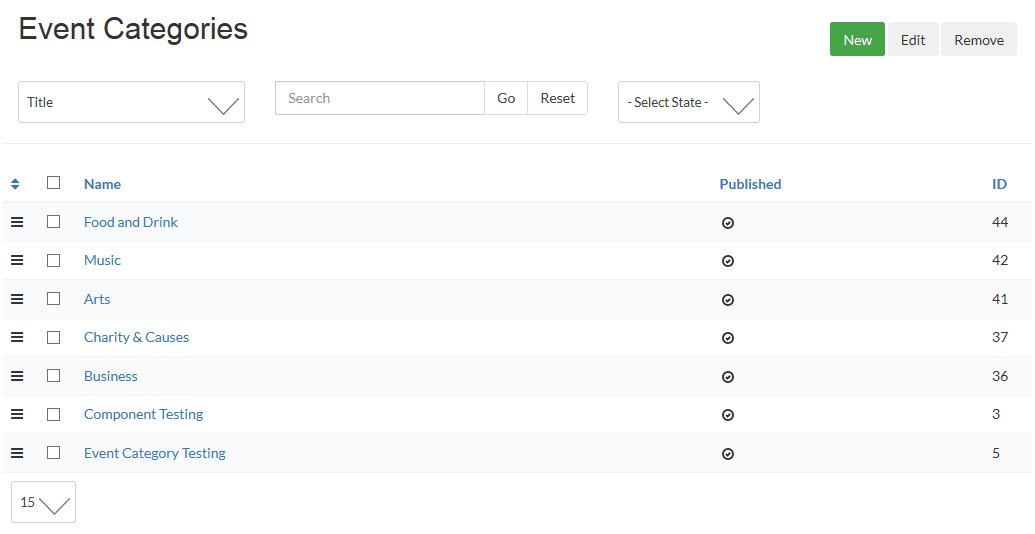
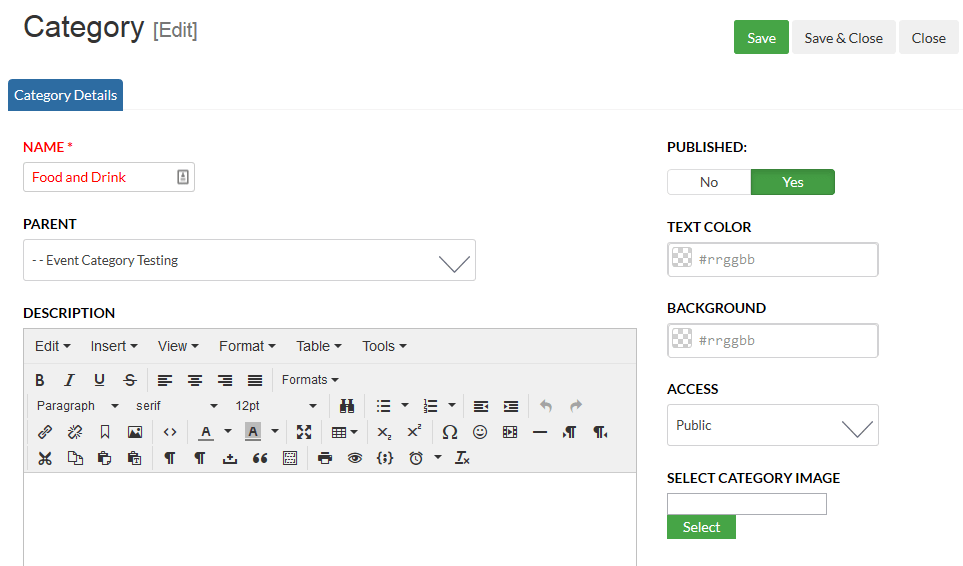
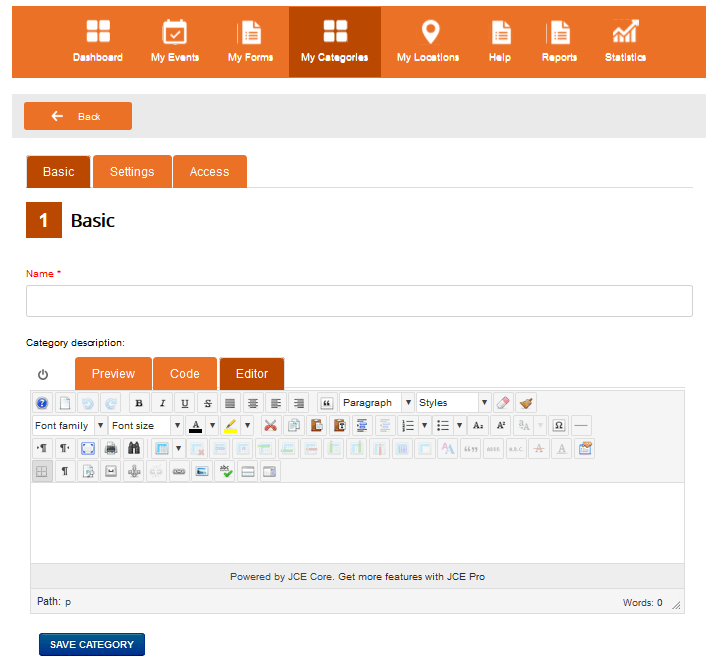
When you add a category, it will be using our own internal category system instead of the standard Joomla category system because we like to add a few more options to make things prettier in the front end. From here, you can set the parent category to make a multi level category system, a category description, text color and background color.
Adding Colors to Categories
This is where you can set the background color and the text colors for this category by using the color pickers that are in each field. You should make sure that you dont select the same colors for both fields or you won't be able to read the text.
Whichever color you choose, the background of the category in the front end will have that color as its background label colors in the calendar and accordion category views.
Managing Locations (Where the event will take place)
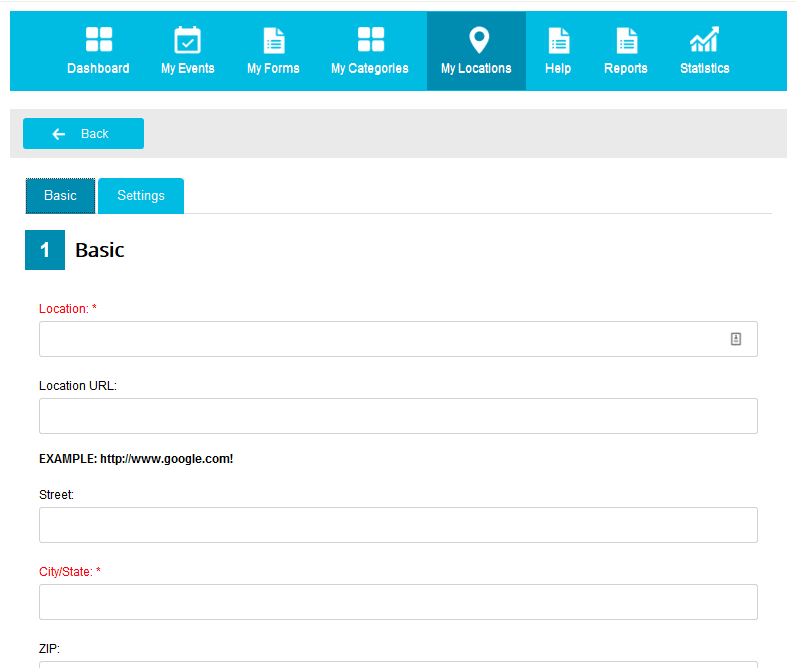
- You can't create an event without first creating a Location. All events must have a location.
- It is not a requrement that the location have a physical address that the location have an address.
- The description for the locaiton will be shown in the front end of the event details page. You can also add images for your description too.
- As many events as you want, can use the same location.
- The location URL will link to the location's website in a new window.
- If you want to show the Google Map in the details page, then enter the address in the address field.
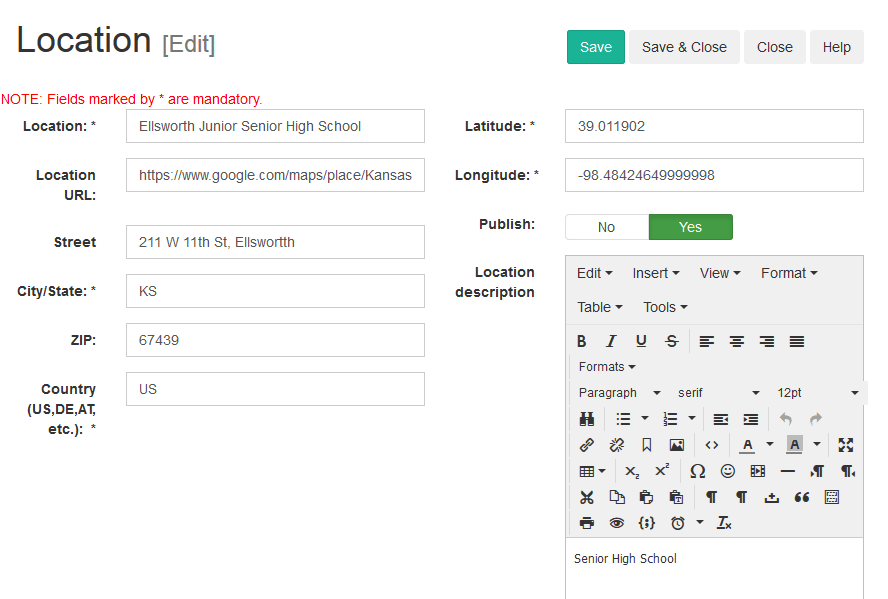
Adding a new location
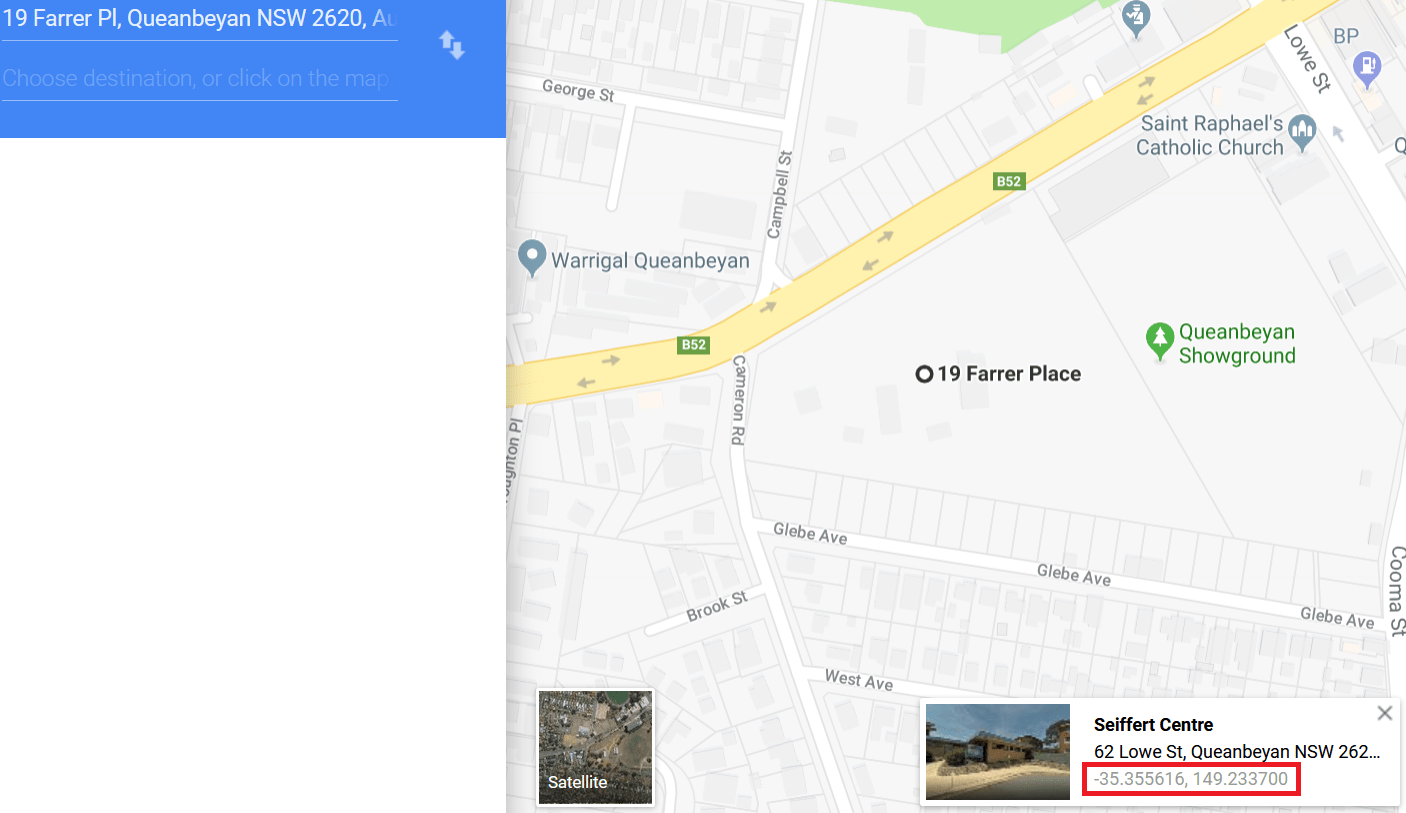
Finding the Latitude and Longitude for a locaiton can be quite daunting. However, here is how you can do it quickly.
Open Google maps. (https://maps.google.com) and type in the location you need the co-ordinates for.
Eg:Queanbeyan Showground, Glebe Avenue, Queanbeyan NSW, Australia
Google will open the map, with the location. Somtimes there will be a marker already present on the map and other times not.
Right-Click on the locaiton you need and you will see a custom context menu. Select the "Whats Here?" item.
You will now see a little window show near the bottom of the screen. In it will be the Lat and Long that you need to enter in the Locaiton form.
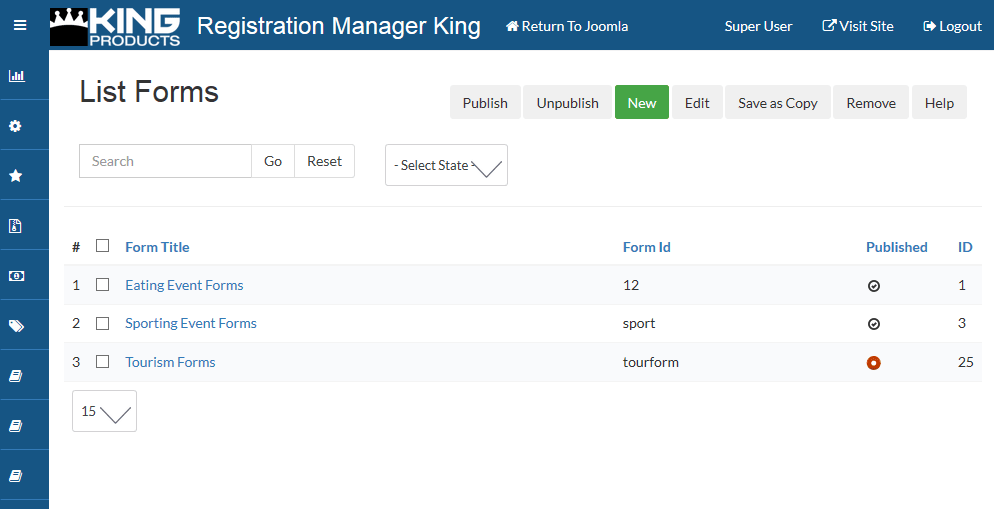
Registration Manager King allows you to make your own customized registration forms.
You can choose create your own fields that you would like the registrant to complete out when registering for events during the checkout process.
You can use a single registration form using the group registration option for purchasing multiple tickets, and you can create a seperate form for each event, so if you go through checkout and select two different events, the user will get to different registraiton forms.

Creating the Registration Form
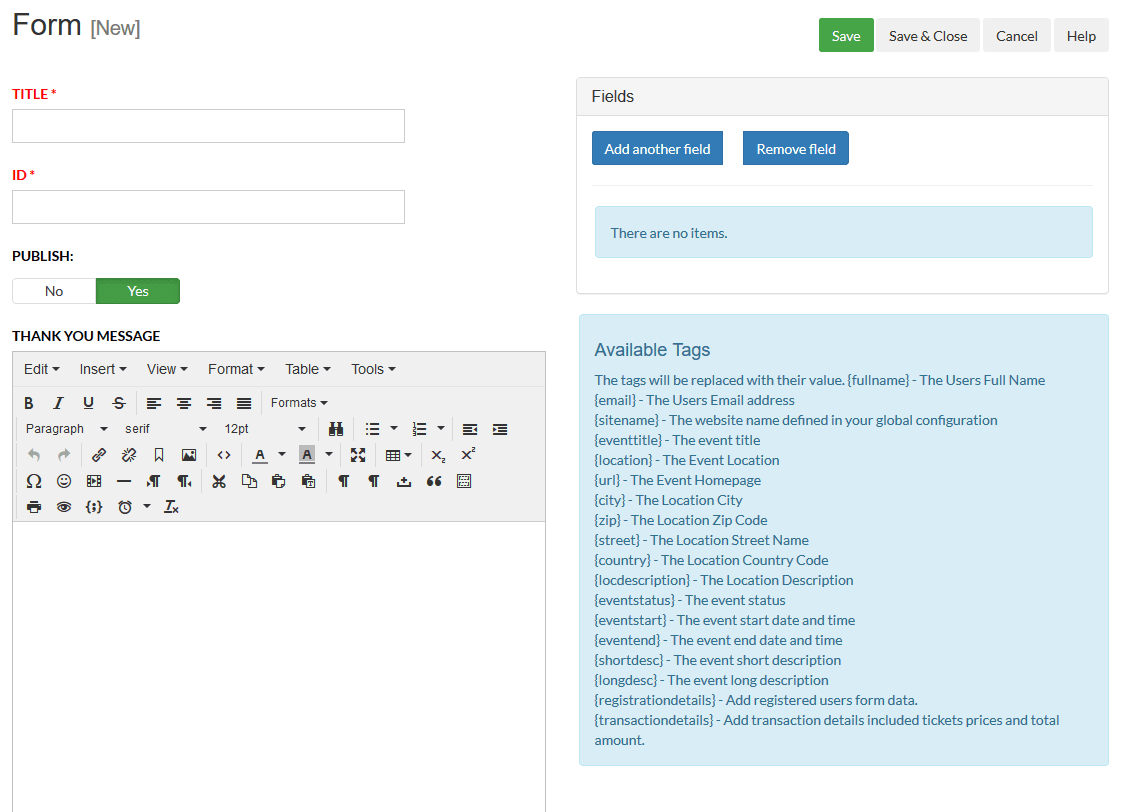
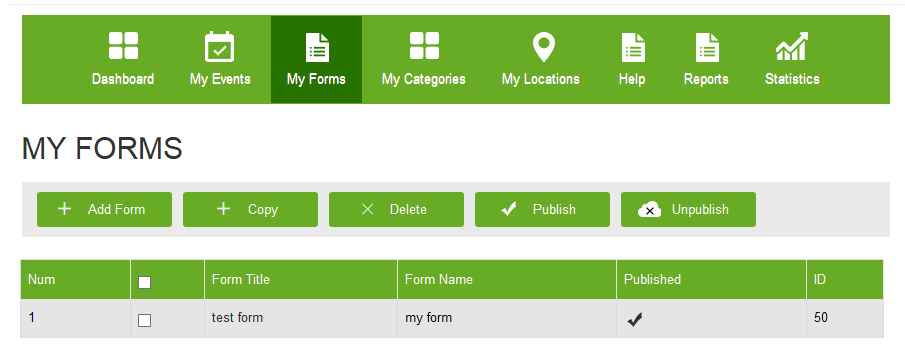
- As mentioned in the documentation, before you can create an event, you need to create a registration form that users can use to enter their details when registering for the event. The minimum you need to do here is to enter a Name and and unique ID for the form and then click Save.
- When you save it, it will appear in the list of available forms, unpublished.
- Click on the title of the form and it will open in Edit mode.
- Wehn new forms are reopened, the system will automatically add the 3 required fields (First Name, Last Name, Email). You should NOT remove these 3 fields. you should not UNPUBLISH them either. They are mandatory and must be in each registration form.
- You can only edit the titles of these three fields. You should change nothing else.
- Further down the page, you can enter a thank you message that will be shown to the user after registration is completed. If you enter nothing, then they will see the default mesage.
- It is possible to create as many forms as you need. Each of them can contain different field types and thanks pages.
- All the registrants will see this message after they complete the registration to an event that uses a particular registration form.
Creating Thank You Pages
Each thank you page can be customized to show information from the event and attendees.
Near the thanks page input field you can see custom tags which can be used in the thanks area to customize your thank you page.
So that each event can have it's own thank you page, this can be very handy.
The thanks page will be shown tothe attendees after they have finished the checkout process and registered for your event.
Adding Form Fields
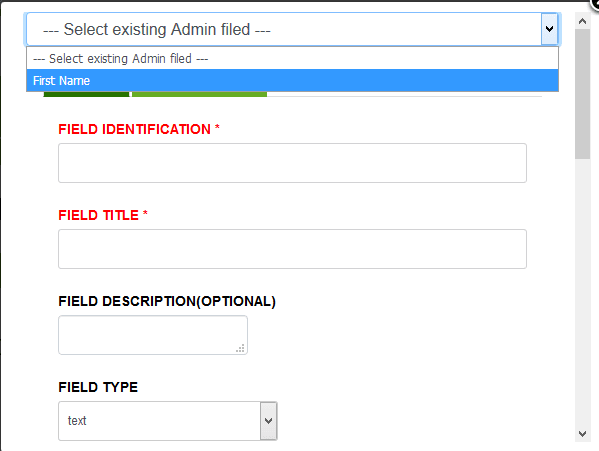
In order to add more form fields you can just click on the ADD ANOTHER FIELD button above the form fields list, on the right.
When you add a new field, you will see various options.
Field Identification: This is just an identifier for the form field. You cannot have any spaces between words or use special characters in this field such as /?,
- Field Title: Form field label.
- Field Description (optional): This is the toolTip information that will be shown on mousover of the field label.
- Field Type: The type of the field. The following is the list of field types that you can create: password, text area, select, multi select, radio buttons, check box, multi check box, file, calendar, and groups.
- Validation Rule: There are several types of content validation that can be performed. It depends on the type of field you are creating.
- Default Field Value: This is the default value that will show when the field is shown to the user.
- Additional Attributes: Here you can add extra parameters to the fields html, for example, you could add style='width:70%'.

Form Field Types
You can make any form field mandatory.
Text Fields:
Text fields are self explanitary. It is for entering any type of text in a standard text input field.
Password Field:
Password fields are identical to text fields but as you enter the data into that field, it is represented as dots instead of the password you typed.
Text Area Field:
Identical to the text field, with exception to the optiosn for setting the number of lines that it will cover.
Select Field:
This is a simple drop down selector as you would see in many HTML forms. You can specify the list of values that the user has the option to choose from.
Multi Select Field:
This is the same as a select field, but in this case, the user can select more than one value. To enter the possible values, just create a comma separated list.
Radio Buttons:
You can create your radio buttons in a Vertical or Horizontal layout. To enter the possible values, just create a comma separated list.
Single Check Box:
Typically a single checkbox is used when you want the user to agree with something, IE, terms and conditions, or a signup agreement.
Check Box Fields:
Multiple checkboxes have two possible layouts, horizontal and vertical. To enter the possible values, just create a comma separated list.
File Upload Field:
This field will show the Browse buttons for users to be able to attach and upload a file during the registration process. For Example, Proof of Age. The uploaded file is accessible from the Submissions page i the admin area.
Calendar Date Field:
With this type of field your registrants can select a date from a nice calendar by clicking on the button next to the field. This would be good if you need to collect a birthday or recent event date.
On the Events Manager page, you can add and delete events, in addition to adding new users to the event directly.
Furthermore, if you need to mark your events with the users that arrived to the event, you can click on the "users" column links, and go to the RegistEred Users page. Here, you are able to click Check-In and this will automatically mark the user as arrived.
Add New User To Event
From the add new user pages, you are able to add a new user to the event system without the user performing any actions.
This is most useful when you perform over the phone registrations for your events.
This way, all you need to do is to select offline payment as the payment method once you have completed the users registration details and then, once that is done, you will also need to set their payment as Confirmed in the Registratered Users Page. To access the Registred Users page, go to the event manager, and select the link in the Users column.

To add a new event just click on the "New" button on the toolbar in the event manager screen.
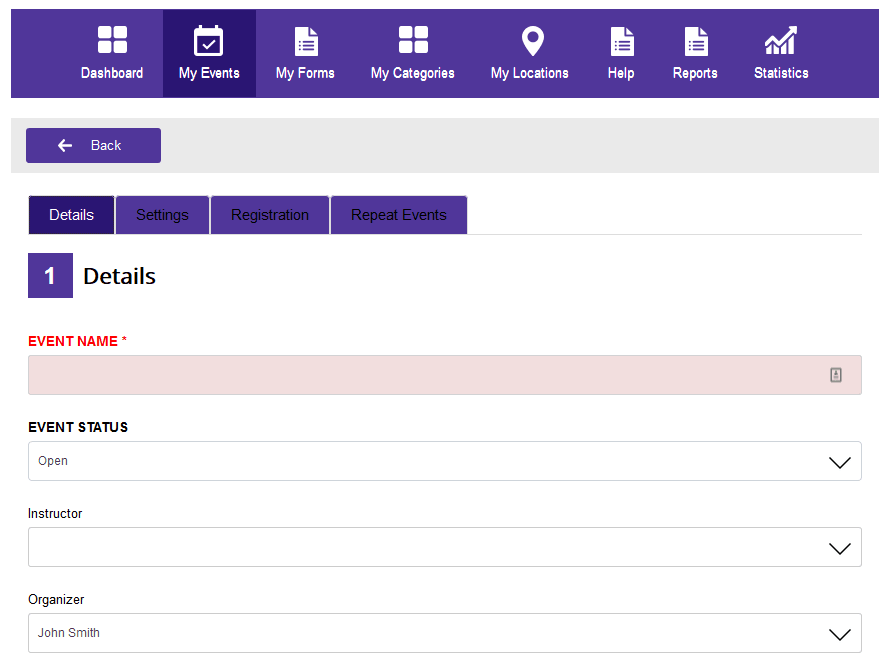
When you click on the "New" button, you will be taken to the event creation screen where you can enter the details for the event.

Event Details
Here you see the required fields in red.
- Firstly you should set the title for the event. And then the start and end dates and time for the event.
- Each event can have up to 5 images. You can select the banner image too. The banner image can be shown above the event details on the detials page. The (upto) 5 images be shown on the event details page.
- The max attendance field sets the max number of tickets that can be sold fir the event.
- Enter the short description for the event. it shows in both the list and details views.
- If you enter the full description then it will be visible on the event details page. The more details the better here.
- If you do not enter terms and conditions here, then the terms from the configuration settings will be used.
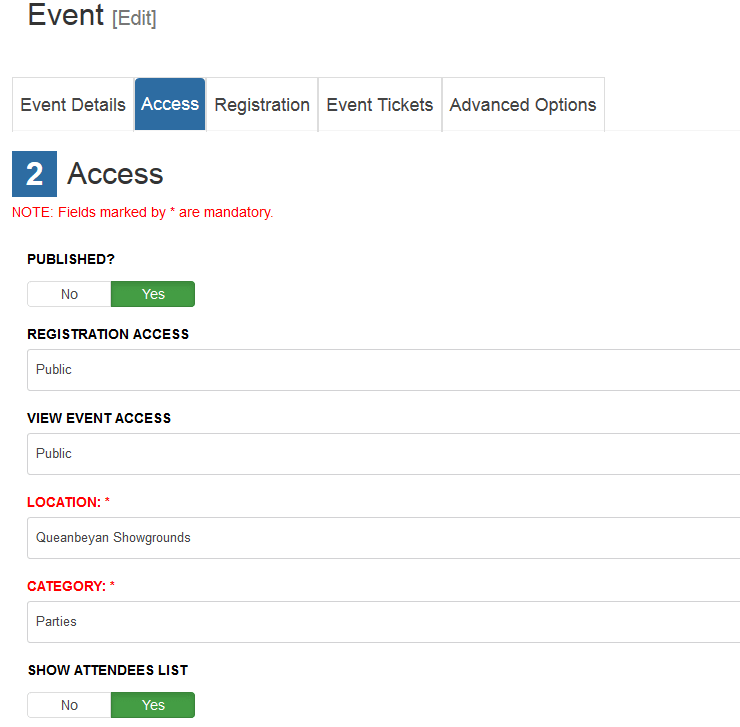
Access

The access tab is where you will define who can access your event details as well as register for your event.
- Registration Access: This is where you specify the Joomla ACL group that can register for the events.
- View Access: This is where you specify the Joomla ACL group that can VIEW events in the front end.
- Publish: As the label says, this will publish or unpublish the event.
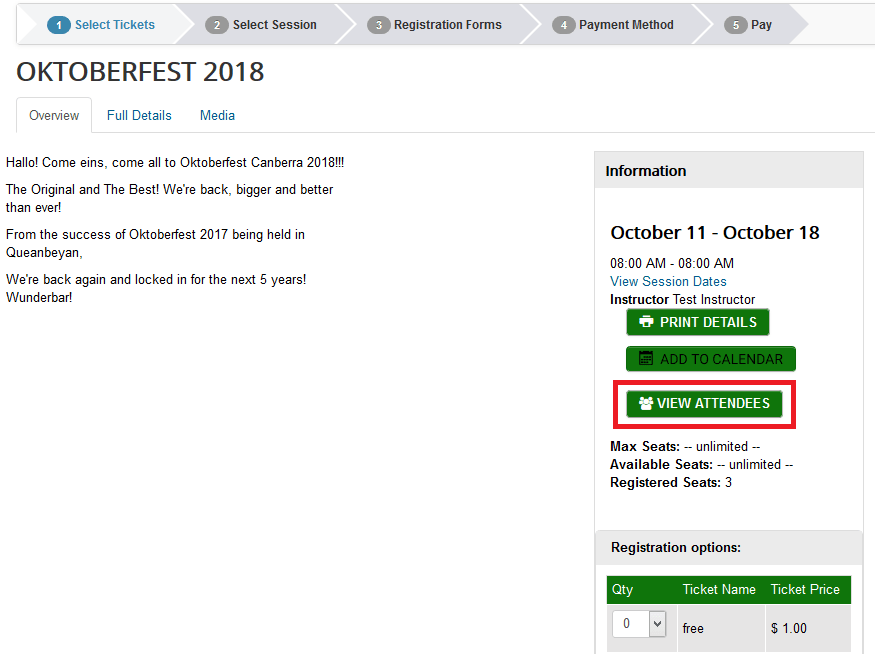
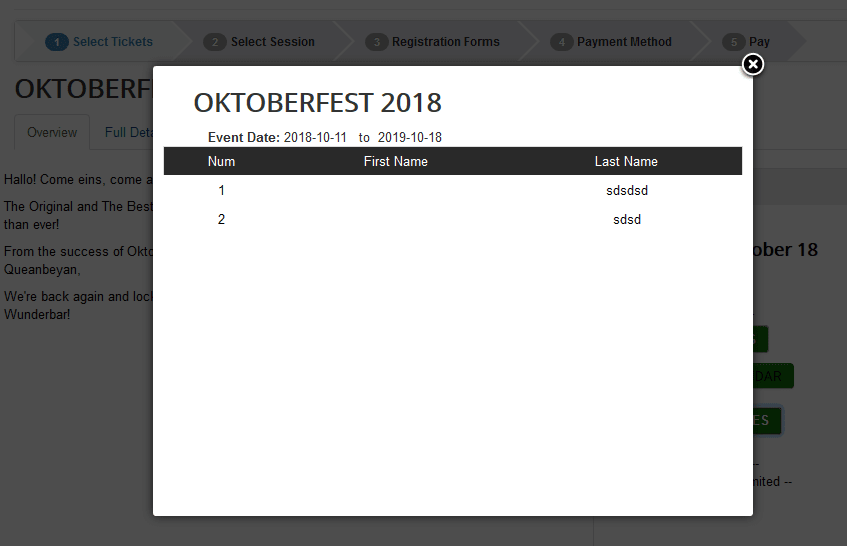
- Show Attendees List: If yous et this option, a link will show on the event detial page that will show the firstname and surname of the currently registered users to the event.
- Allow group registration: Group registration is typically for agencies, so that one agent can register x number of users at the same time, using a single email address for each type of ticket.
- Force group registration: With this set to yes, there will be no checkbox for the user to CHOOSE to use the group registraiton feature. they will be forced to enter one email for all.
- Location: choose the location that you have already created for this event from the list.
- Category: Select the category from the list of categories you have created.
Registration

Registration Tab
- Enable registration: If this option is not set, then nobody can register for your events. Enable it to allow users to Register.
- Notify emails: If you want to be notified when someone registers for the event, then you enter your email address here, you can enter multiple email addreses. If you need an organizer orr instructor etc to be notified, then this is where you enter their address, comma separated.
- Notify Registered users before: You can sed a reminder to the registered users of an event a set number of days before the event start date. The email reminder will automatically be sent out to all the registrants of the event.
- Select registration form: Before you can save an event, you need to have created a Registration Form. So, slect the one you want to use for this event, here.
- Event Registration starts/end dates and start/end times: Set the start date and time tht the users can start registering for the event, also the end date and time needs to be set too.
- Create Joomla user Account: Setting this option to "yes" will force the system to create a user account in Joomla for the user if it does not already exist. An account will be created for each registered user.
Tickets
Creating Event Tickets
If your event is free, then you would create a ticket named "Free" and a price of 0.00. Here you can create an many ticket types as you want with the quantities of each type. The required fields are in red as usual. You can se the tax amount for each ticket and the publishing dates for it too.
Click Save to add your new ticket to the event. To edit a ticket, click it from the list that appears below.
To can create different tickets for an event, Eg, child ticket, Adult ticket, each of which have different prices:
Adult: $15.00
Child: $10.00
You can choose the ticket types you want and the quantity of each. Ie, the number of people registering for the event.
You will then get a registration form appear for each ticket multilied by the quantity you selected. Eg, 2 adult tickets and two child tickets means you will get 4 registration forms. Hoever if the Group Registration option is enabled, you could set the checkbox for Group Registration, and only get ONE form.
Meta Data
Meta Data Tab

For those knowlegable of SEO and marketing for Sear Engines, you will know what these fields are for. For those that don't know, these fields are special fields that allow search engines to index your content and present it higher in the search results.
Recurring
Recurring Tab
Recurring allows you to reproduce your event quickly and easily. So, if you have an event that you want to repeat on a specific interval, then you use this feature.
- Recurrence: Here you select if you want to repeat it monthly, weekly, daily or on a specific weekday (RE: every Sunday), or on a specific set of multiple custom selected dates.(specific dates code has not yet been implemented)

Add Ons (Upsell Items)

This is where you add the details for your addon product.
- Product Name
- Price of the product
- Tax as a percentage
- Quantity available.
- Description
- Start and end dates for publishing the addon product.
Emails
Here you can set Email settings.You can add different emails for different groups like organizers, Instructors etc.
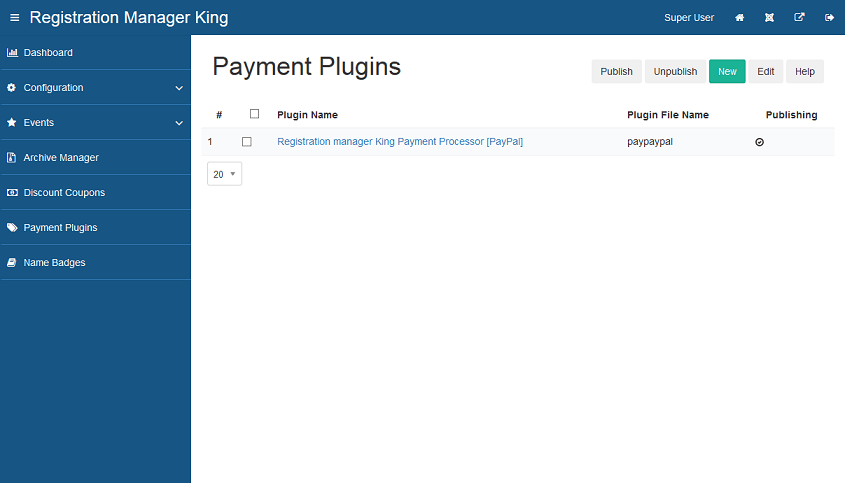
From the Event Registration Manager King dashboard, click on the tile "Payment Plugins"
This will open the list of installed payment plguins for the Event Registration Manager King Software.
We install the offline payment plugin with the component when you install it. If you want to install more payment plugins, then you could download them from our site, or have them developed yourself. They install via the Joomla plugins installer.
After upgrading the component, you should not need to update the payment plguins however, you can update them via the joomla plugin manager, if needed.
Installation of payment plugins
Install new payment plugins;
1. All Payment plugins are installed as Joomla plugins via the extension manager in Joomla.
2. Open the Extension Manager and select Install, Select the Upload Package File tab, then select the payment gateway plugin you wish to install.
3. Click Install, or alternatively if you used the new drag and drop feature, it will auto install.
4. The plugin will not be automatically published. You will need to publish your payment plugin before you decide to use.
Configuring payment plugins
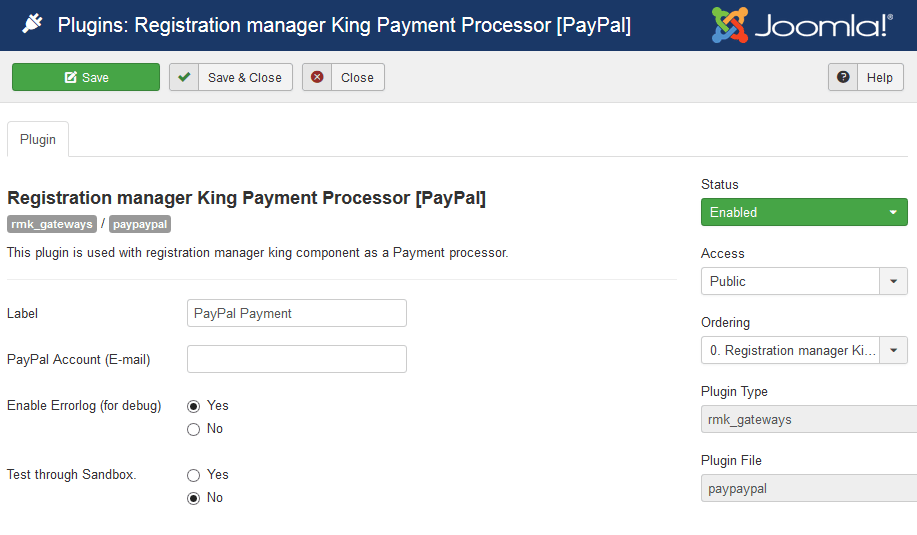
- To configure each of the payment plugins, you need go to the payment plugins area from the Event Registration Manager King dashboard or to the joomla plugin manager and click on the title of the plugin to open it. Now you can enter all the config details that are needed for your plugin to communicate with the payment service provider. The last thing you need to do now, is to publish it.
- You can change the name of the plugin title that is displayed on the front end when the customer select their preferred payment method.
More Payment Gateways
Event Registration Manager King can give the user a choice of multiple payment options to your customers when purchasing.
By default, with an install of Event Registration Manager King, the main component is installed along with an offline Payment Plugin. Ths payment plugin will show a message to the user after the purchase so that they can either mail in their payment or deposit directly into your bank account. We have more payment plugins available for sale in the downloads area of King-products.net that you can install separately as needed.
We can develop specific payment plugins for you if needed at an additional development fee. You can email us and we can developthe one you need.
- Joomla Profiles
- Community Builder
- JomSocial
- Easy Social
- Profile LMS

- Their orders
- Event registration history
- Current shopping cart
- User Profile
- Instructor or Organizer profile




Nametag Generator


| NON-BREAKING TABLE | ||
|---|---|---|
| 1-1 | 1-2 | 1-3 |
| 2-1 | 3-2 | 3-3 |
| 3-1 | 3-2 | 3-3 |
- font-family
- font-size
- font-weight
- font-style
- color
- background-color
- text-decoration
- width
- height
- text-align
| [NAME] | Name of event attendee |
| [BOOKING_DATE] | Date of Booking For Ticket |
| [BUYER_NAME] | Name of ticket buyer |
| [EVENT_IMAGE] | This is Event Image |
| [EVENT_NAME] | This is Name of Event |
| [EVENT_URL] | Link for Event |
| [ST_DATE] | This is Start Date of Event |
| [EN_DATE] | This is End Date of Event |
| [EVENT_LOCATION] | This is location of Event |
| [TICKET_ID] | This is Ticket ID of Event |
| [TICKET_TYPE] | Ticket Type set by Event Owner while creating events |
| [TICKET_PRICE] | This is price per ticket |
| [TOTAL_PRICE] | This is total price |
| [EVENT_DESCRIPTION] | This is event Description |
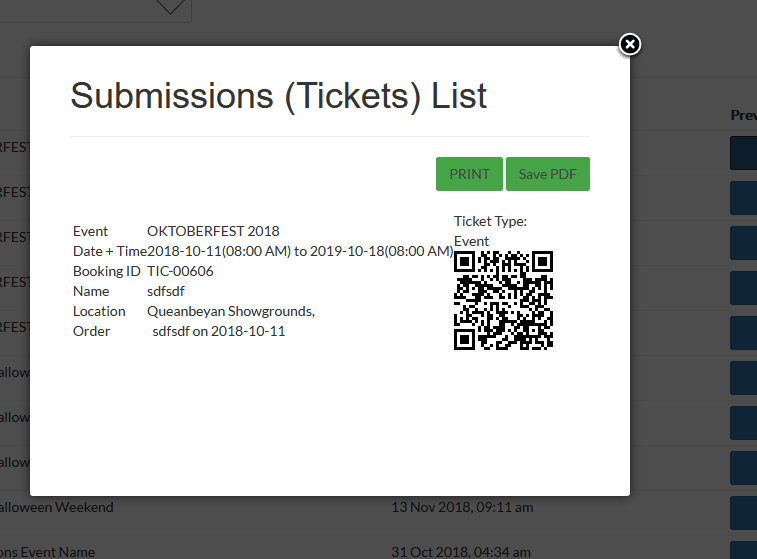
| [QR_CODE] | This is QR code which is verified at time of event |
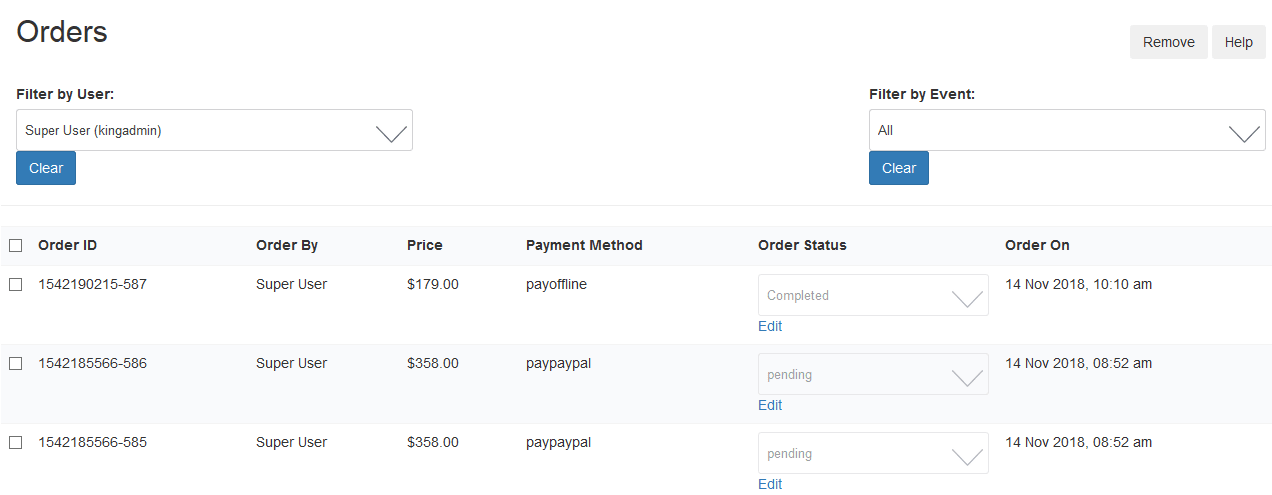
Using the order manager section, you can change the status of orders from Pending (typically from offline payments) to Completed.


